This guide walks you through setting up a Microsoft 365 integration using the Service Principal application authentication method.
Prerequisites
Before starting, ensure you have:
Microsoft 365 Global Administrator access or appropriate Microsoft Entra ID permissions are required to create a service principal application and assign read-only permissions.
Access to Azure Portal (for Microsoft Entra ID - portal.zure.com
Authority to grant admin consent for API permissions
Step-by-step setup process (all steps are mandatory)
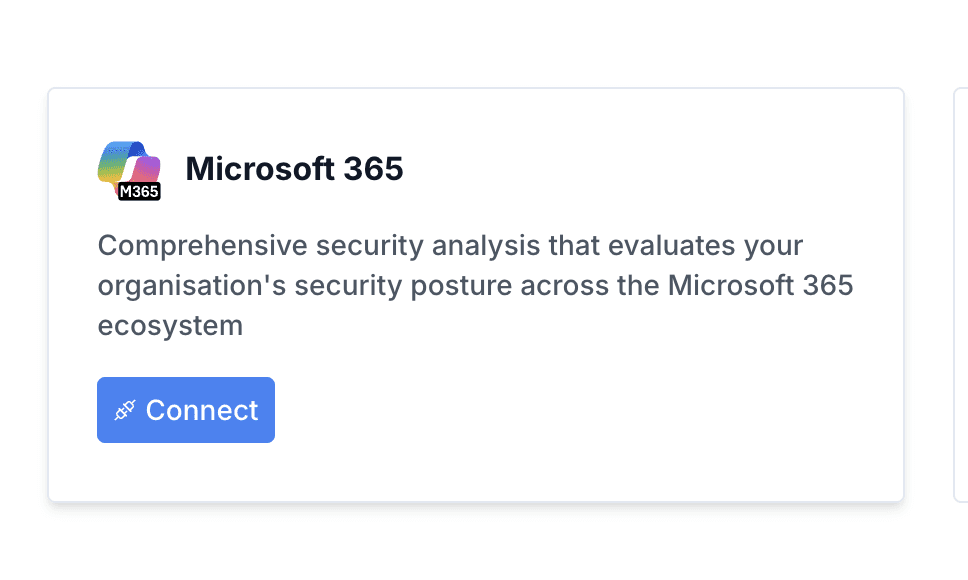
Step 1: Access the Microsoft 365 Integration Dialogue
Navigate to Integrations in the Swise menu and locate the Microsoft 365 integration. Click Connect to open the "Connect Microsoft 365" dialogue.
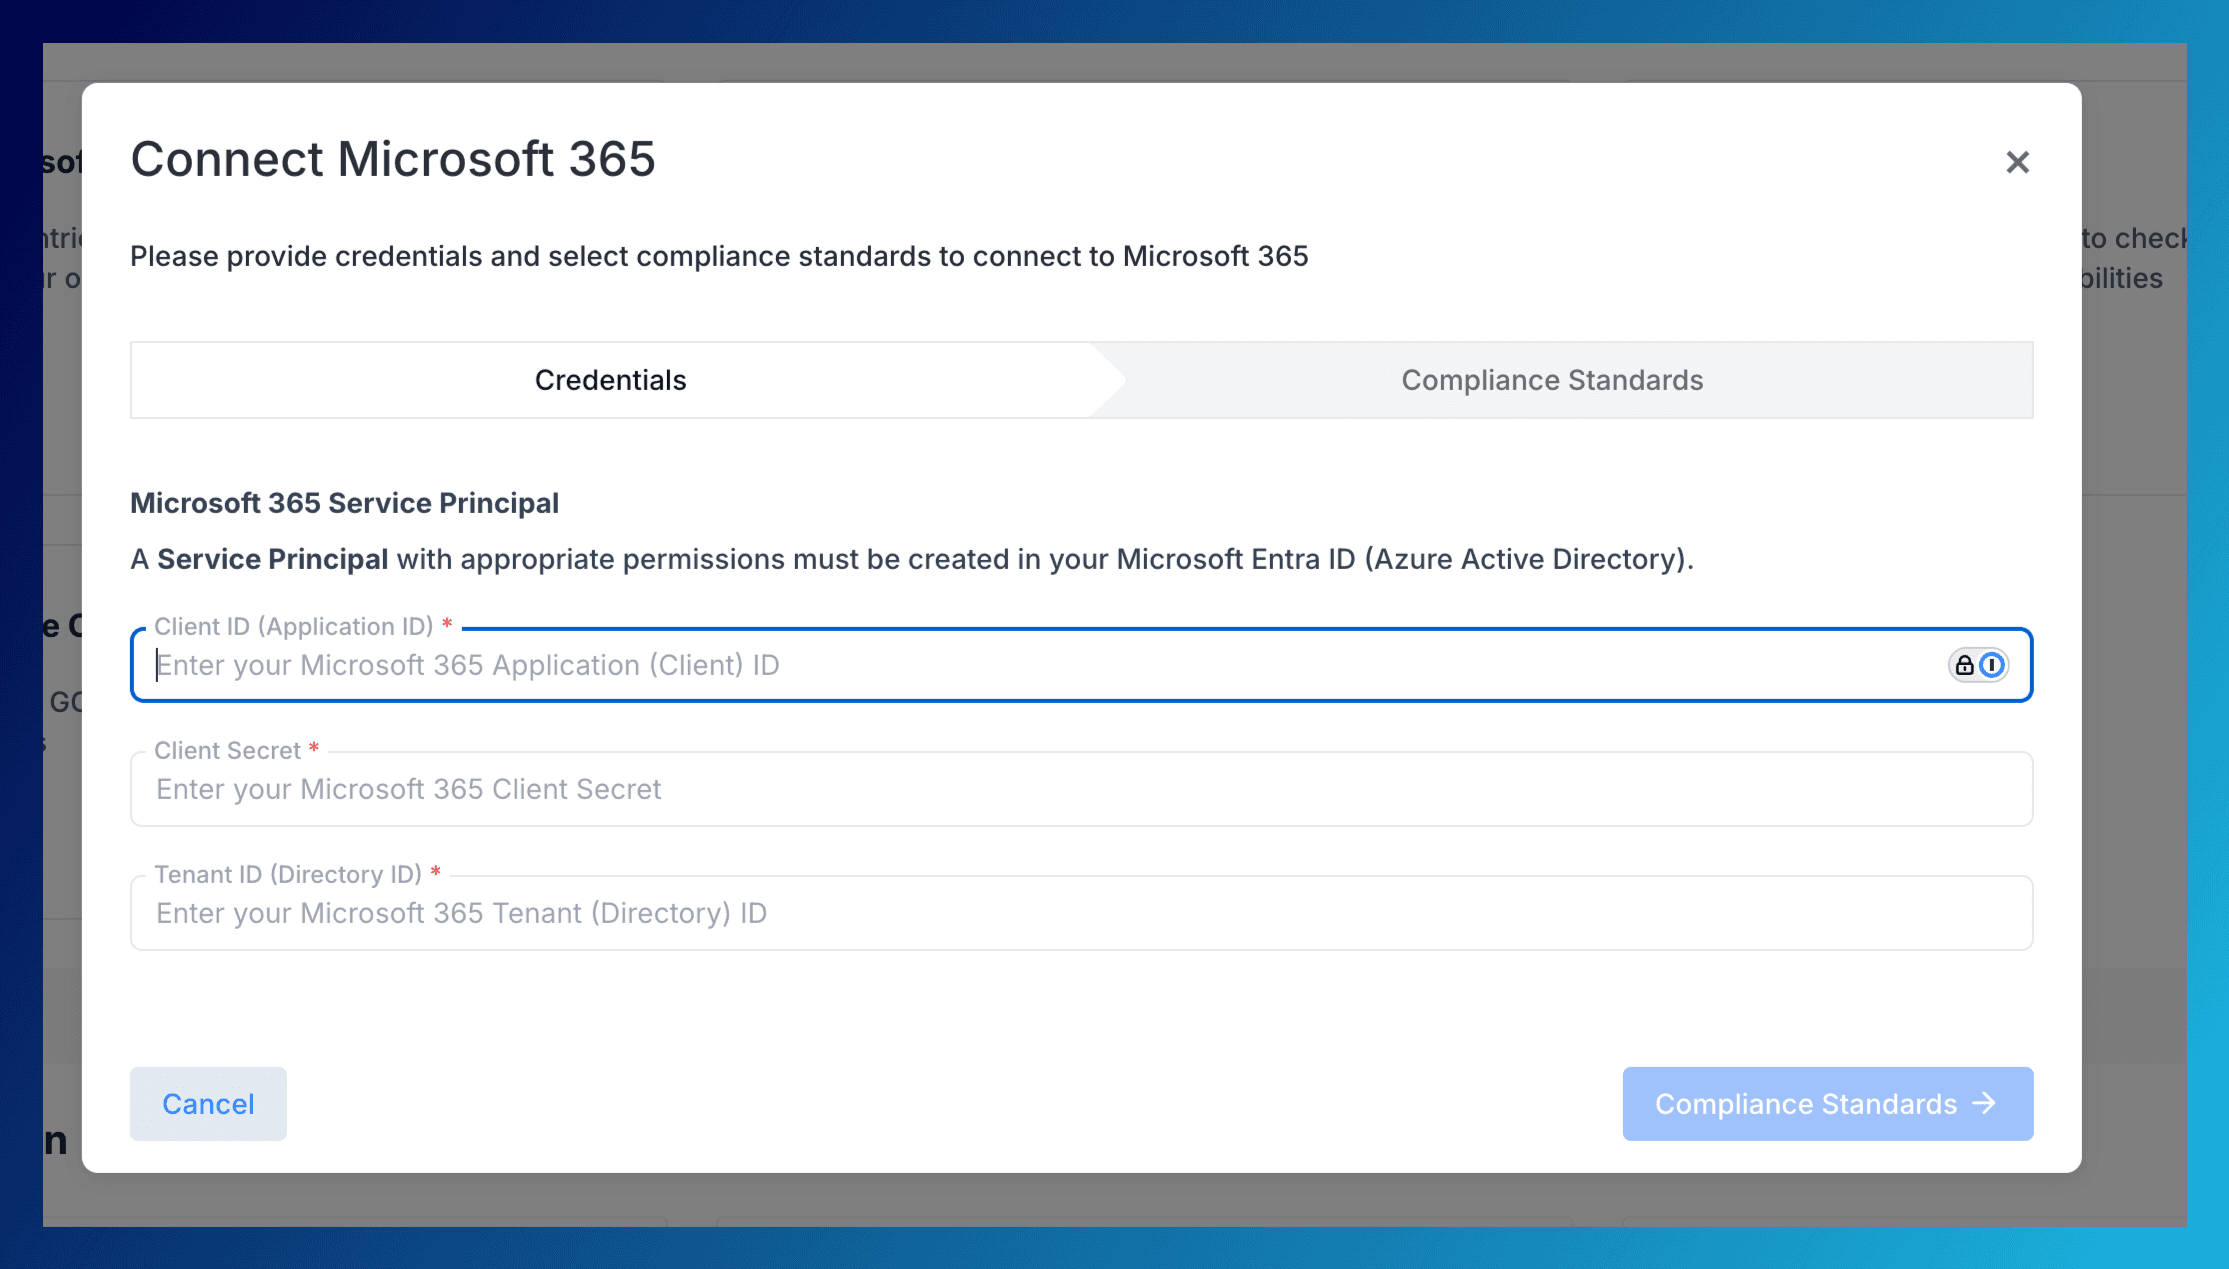
Step 2: Configure Service Principal Credentials
In the Credentials tab, you'll need to provide the Service Principal authentication details. Before proceeding, you must create a Service Principal in Microsoft Entra ID with the proper permissions.
Creating the Service Principal
Access Microsoft Entra ID in the Azure Portal
Navigate to App registrations in the left menu
Click + New registration to register a new application
Fill in the Name (e.g., "Swise M365 Integration"), select Supported account types (choose "Accounts in this organisational directory only"), and click Register
Once created, go to Certificates & secrets in the left menu
Click + New client secret
Fill in Description and Expires fields, then click Add
Important: Copy the secret value immediately - this will be your Client Secret
Step 3 Assign Required Permissions
Before completing the integration, you must assign the proper permissions to your Service Principal. This involves Microsoft Graph API permissions and external service permissions.
Microsoft Graph API Permissions
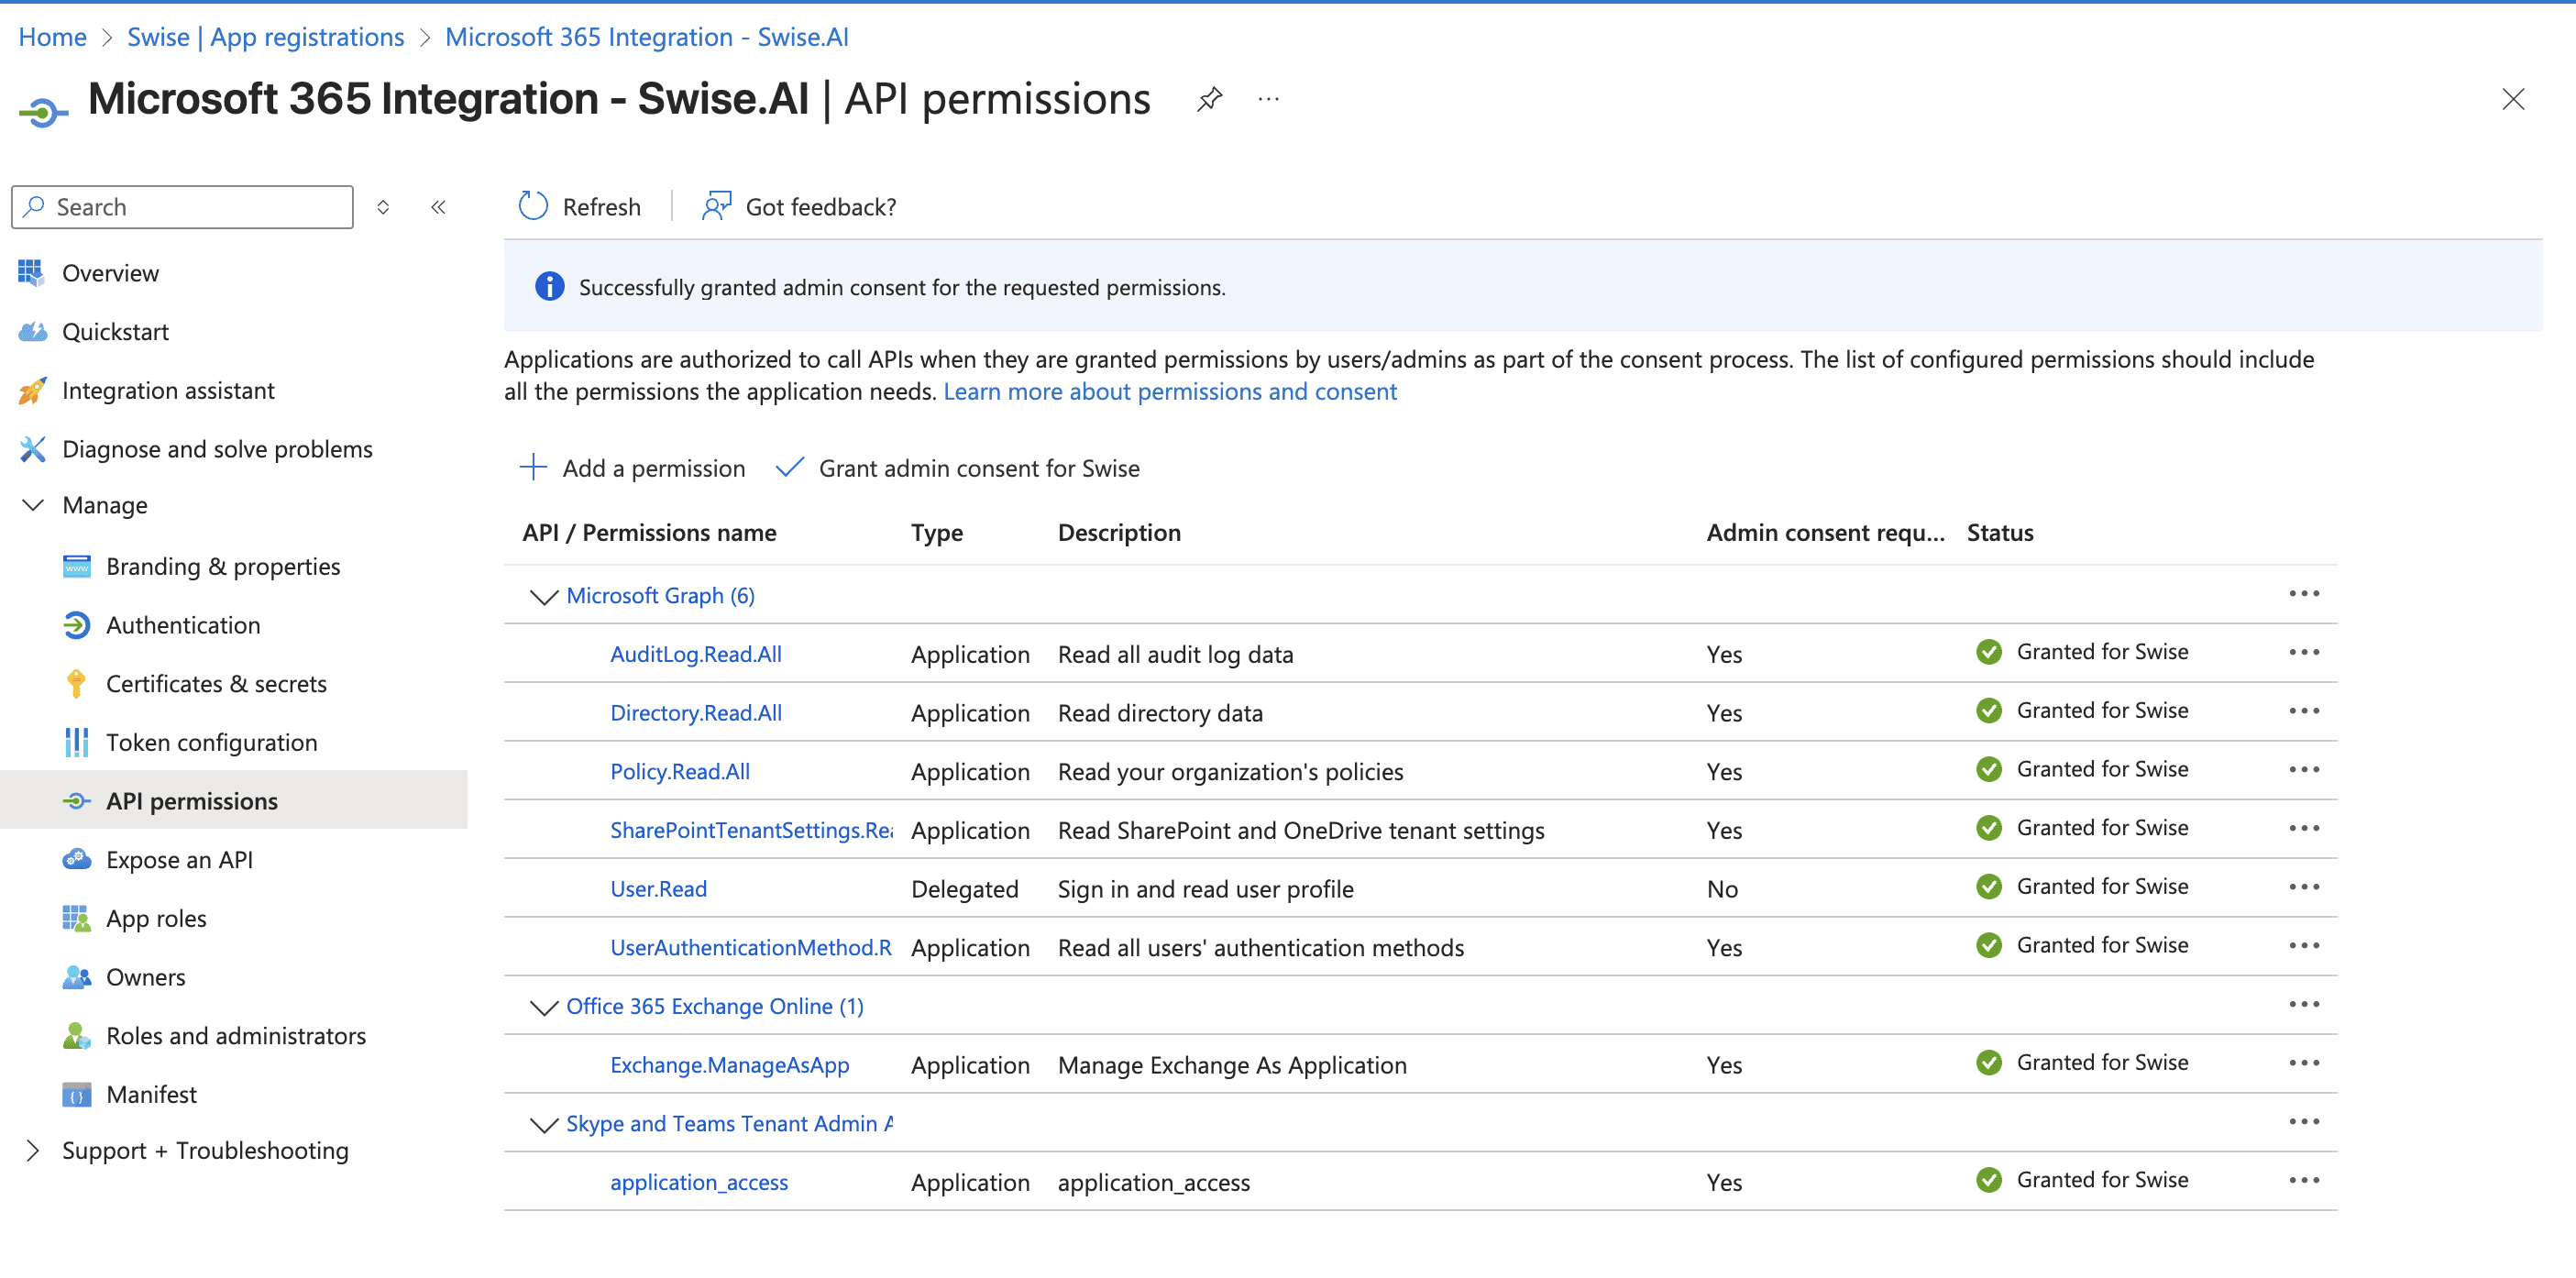
Assign the following Microsoft Graph API permissions to your Service Principal:
AuditLog.Read.All - Required for audit and compliance monitoring
Directory.Read.All - Required for all identity and directory services
Policy.Read.All - Required for policy and configuration checks
SharePointTenantSettings.Read.All - Required for SharePoint service monitoring
UserAuthenticationMethod.Read.All - Required for MFA and authentication checks
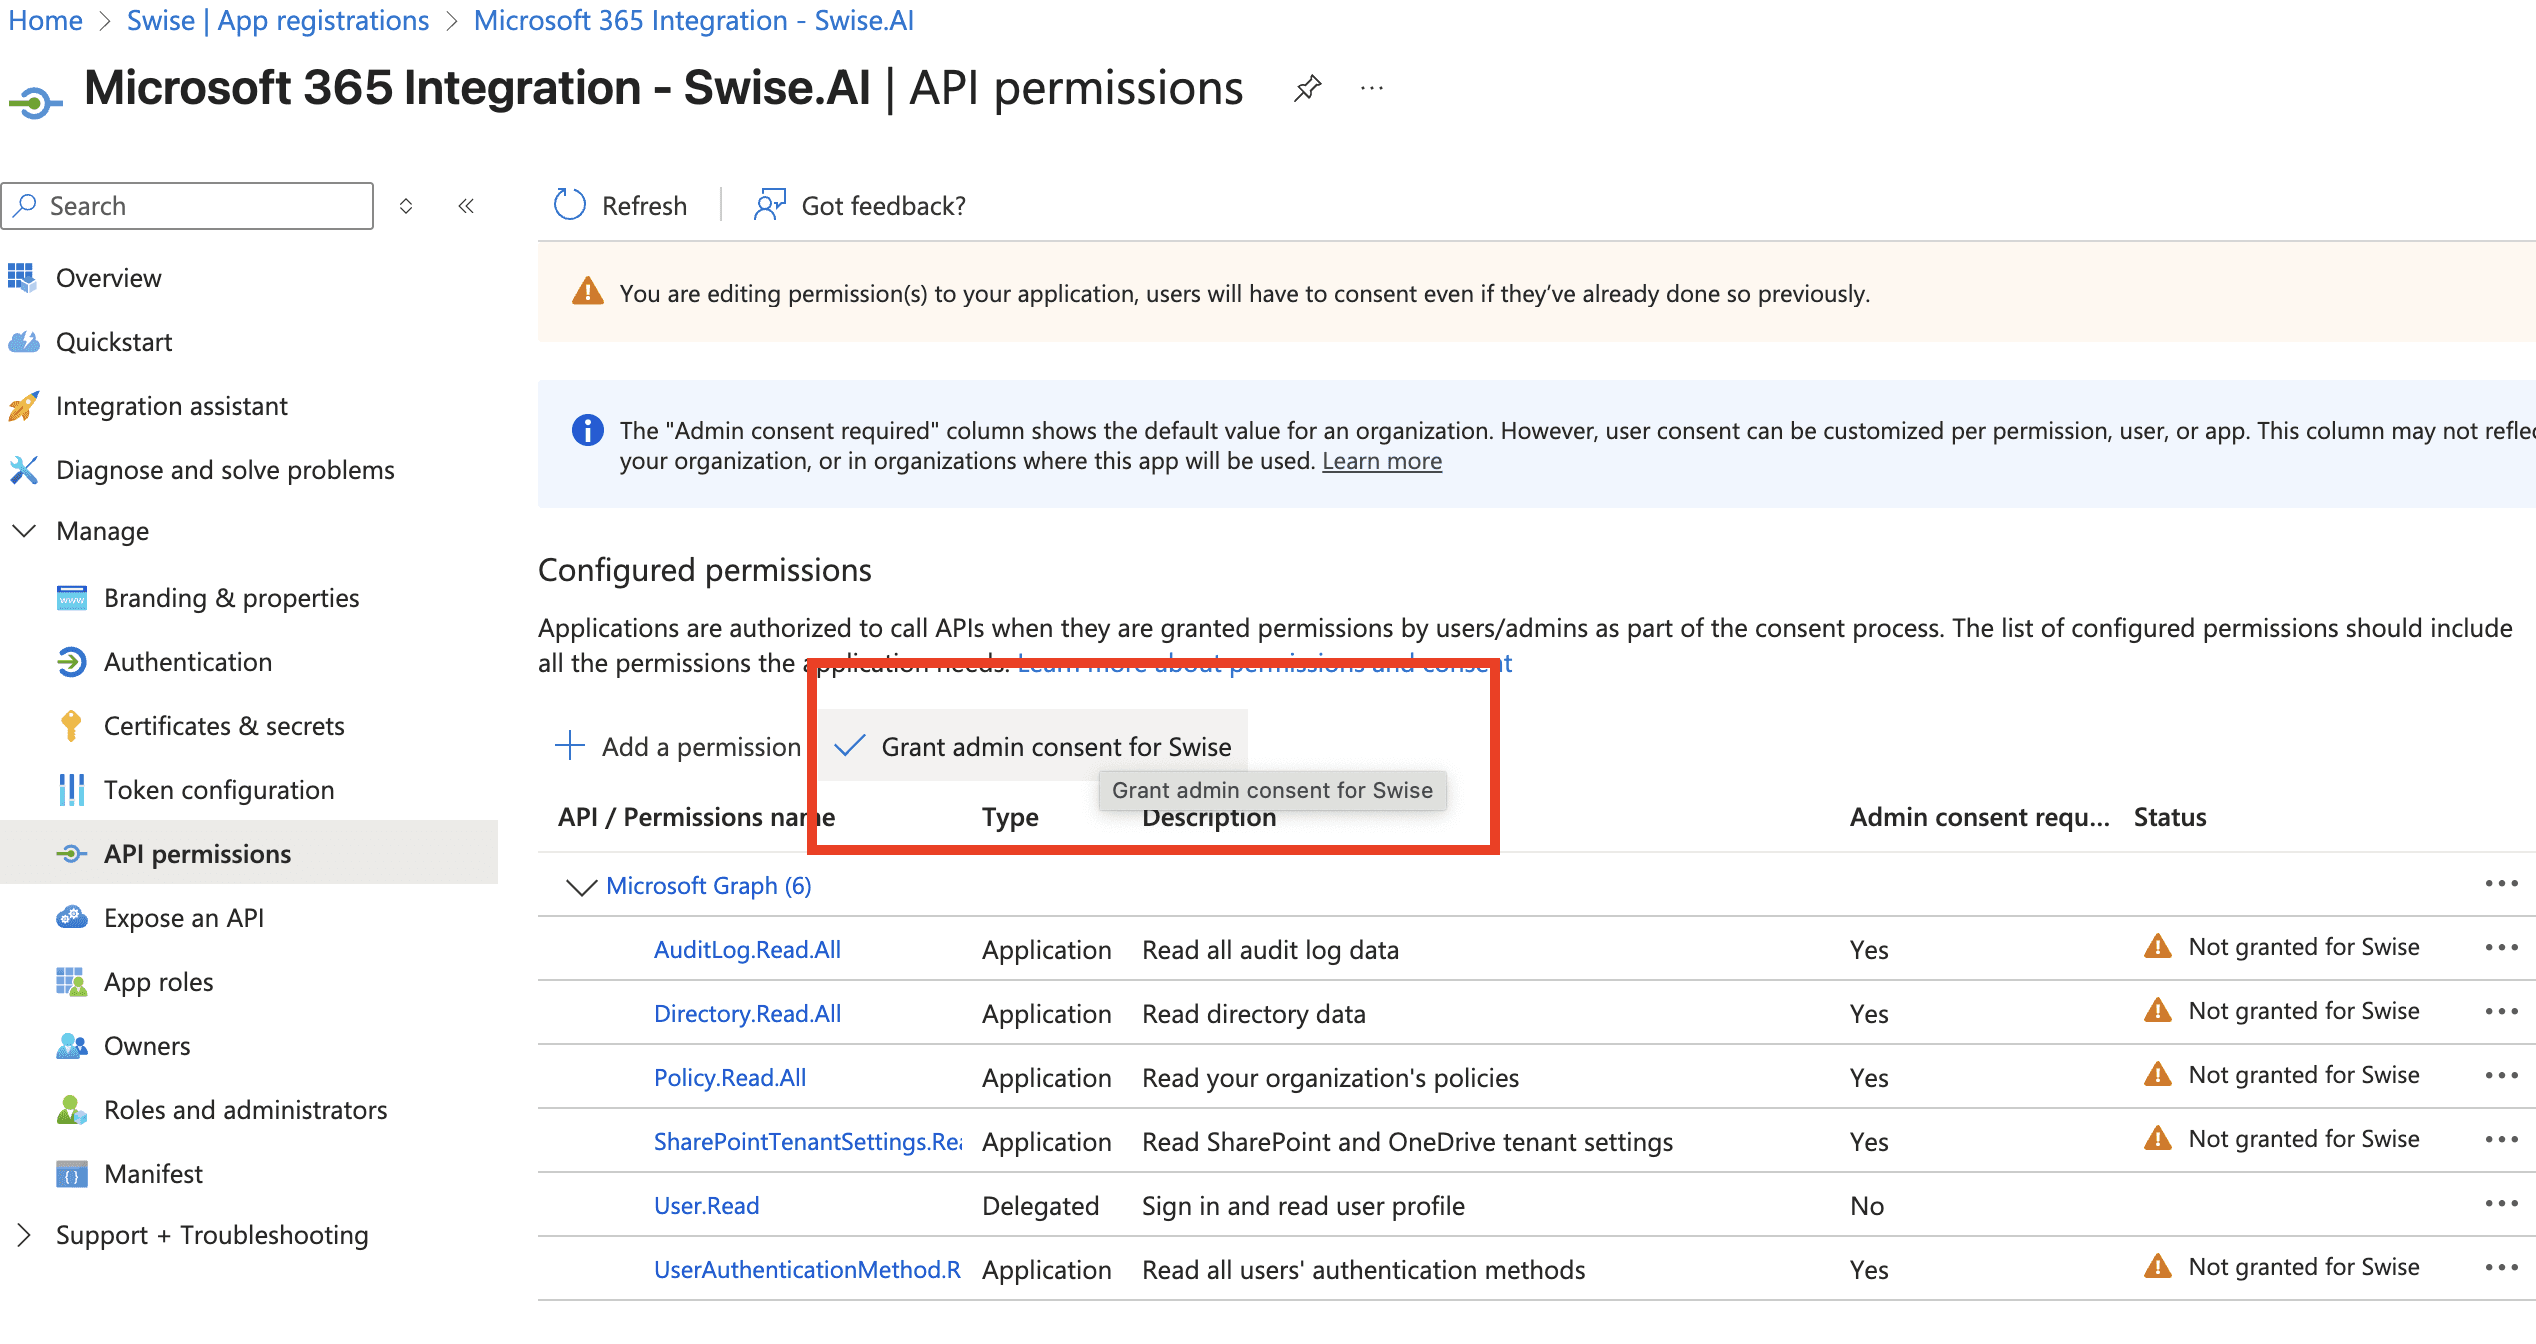
Navigate to your App registration → API permissions
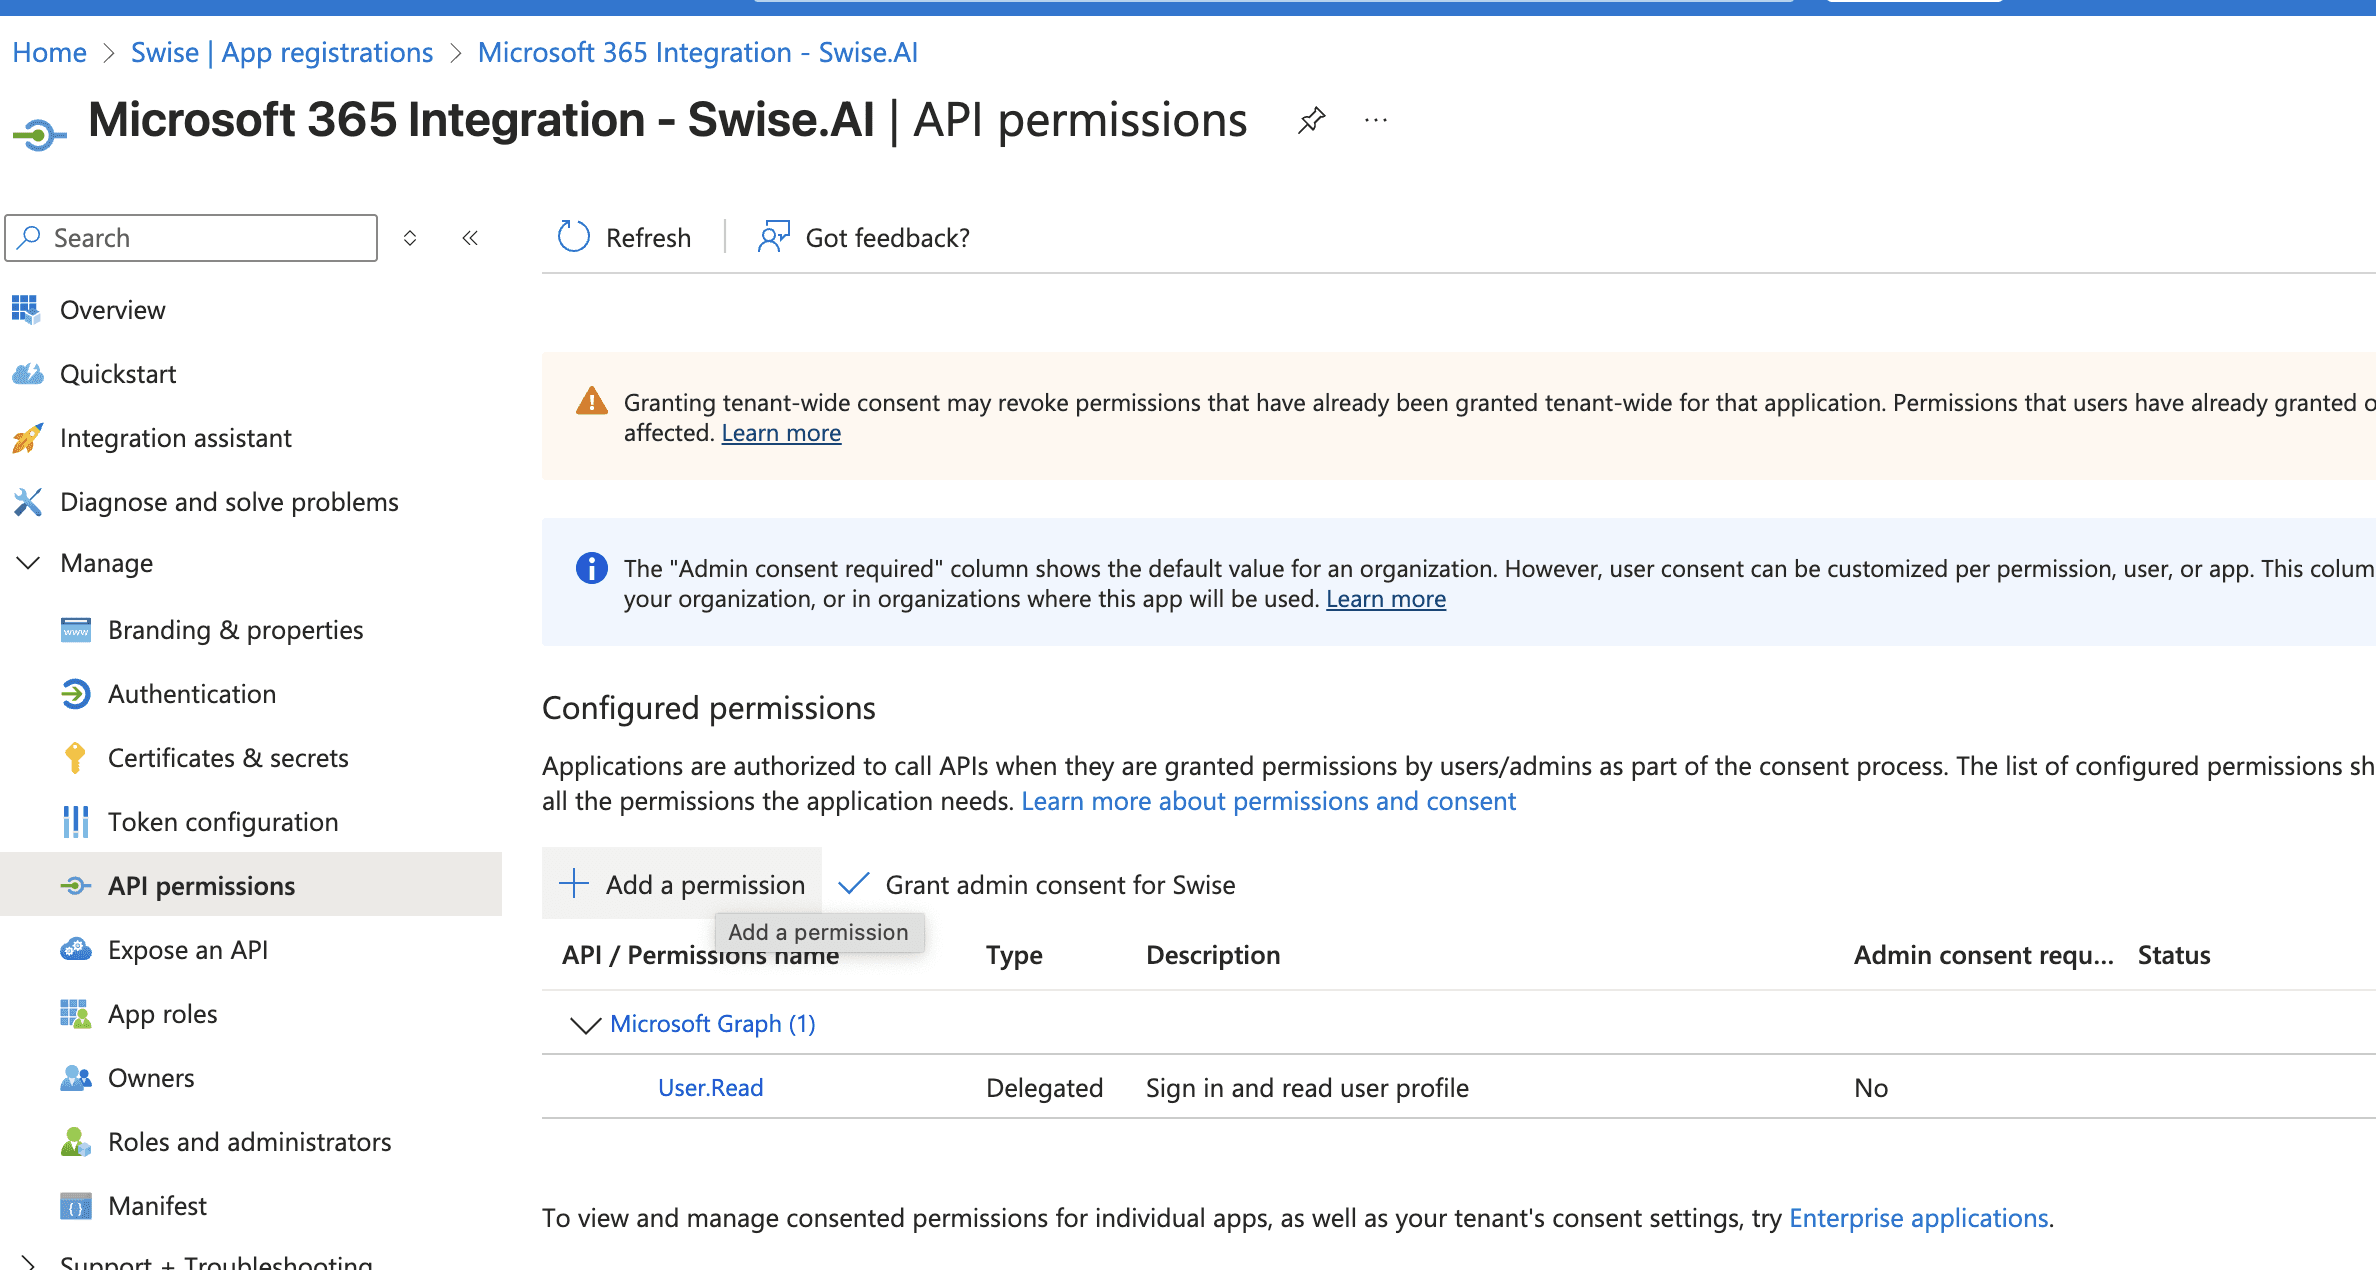
Click + Add a permission → Microsoft Graph
Select Application permissions (not Delegated)
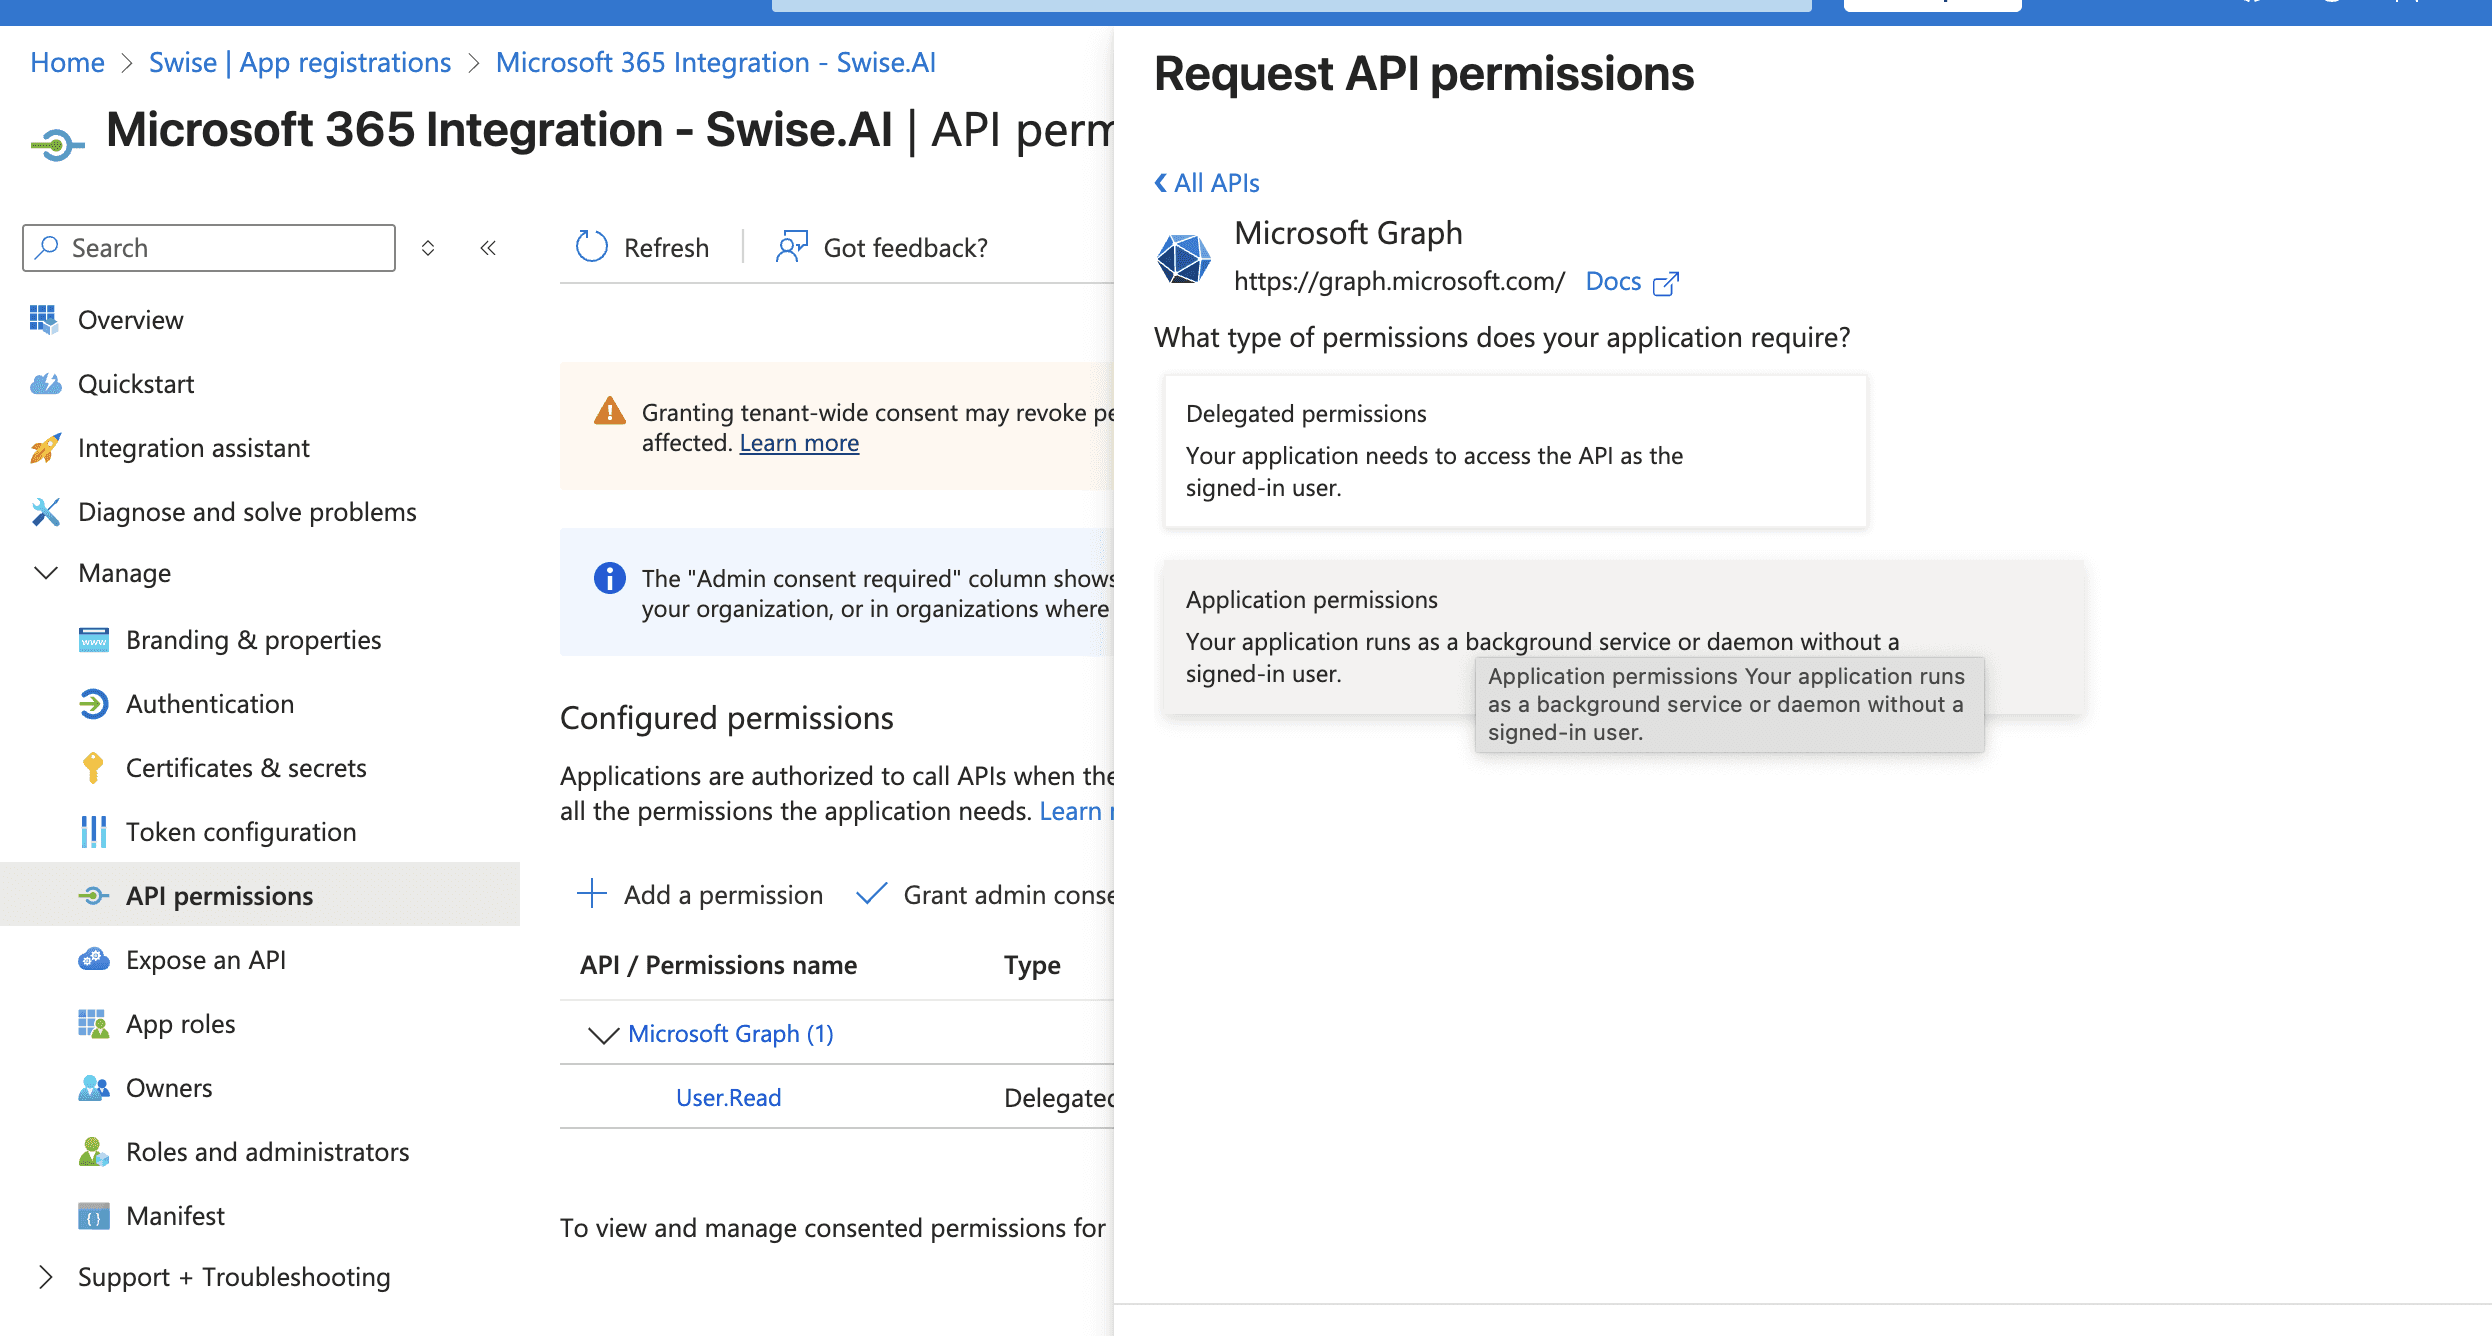
Search for and select the five permissions listed above
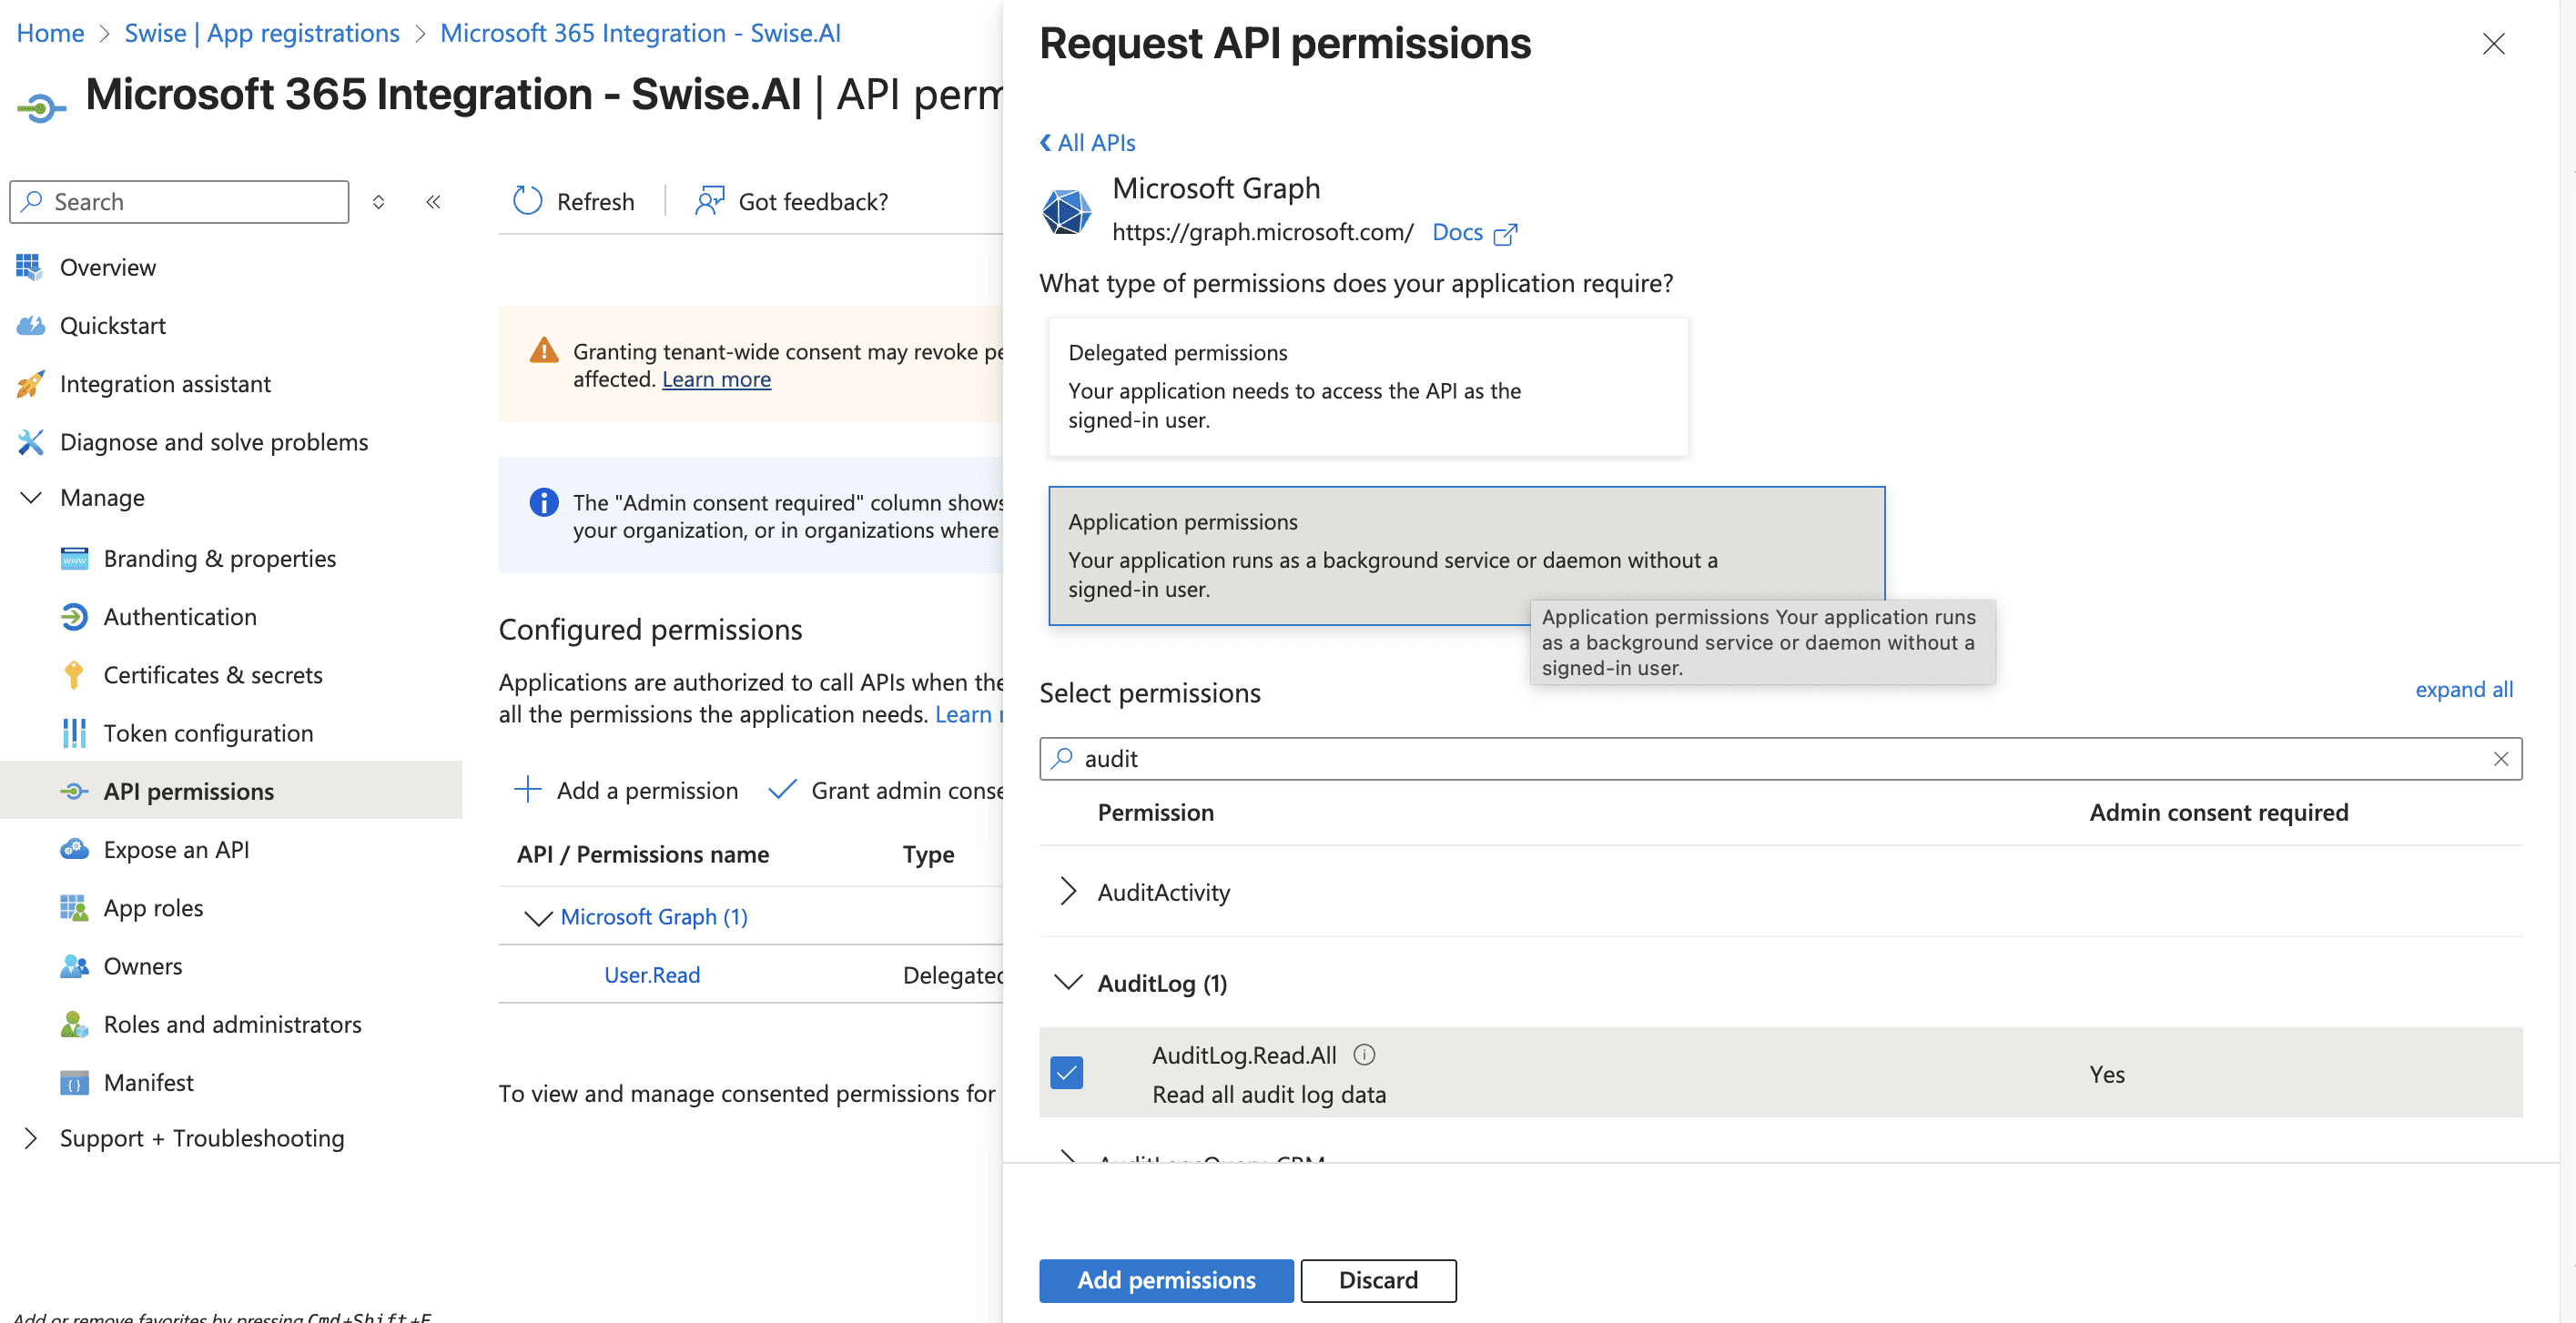
Click Add permissions
Important: Click Grant admin consent for [your organisation] to activate the permissions
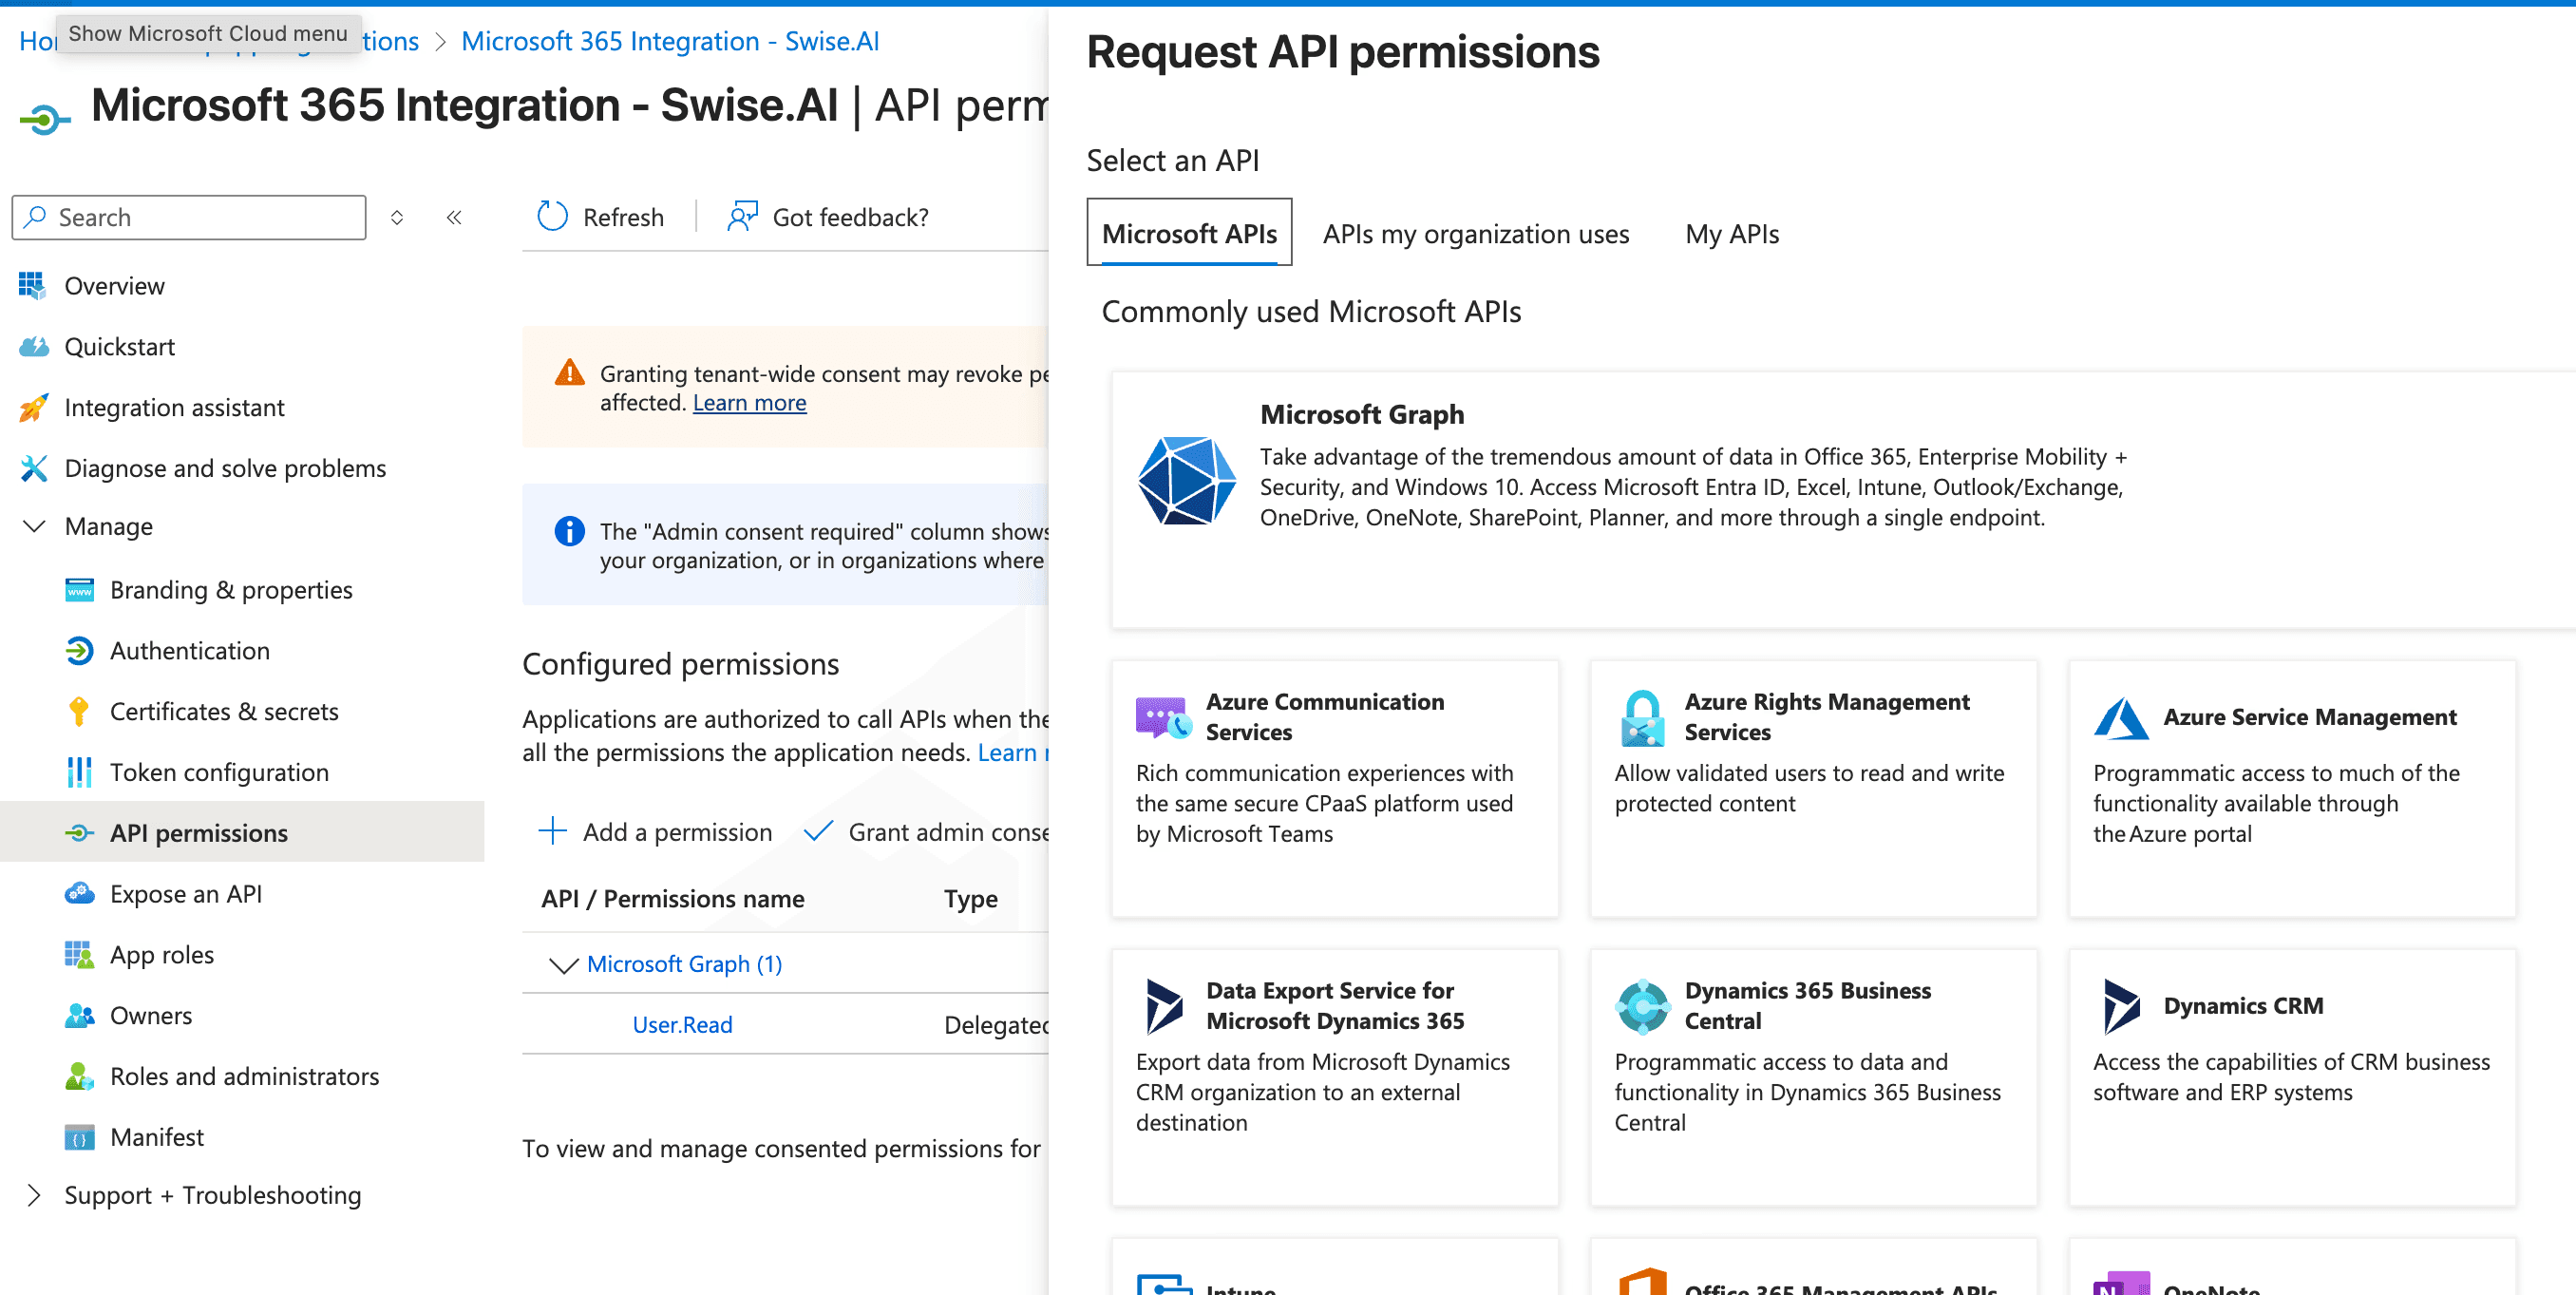
Grant PowerShell Module Permissions
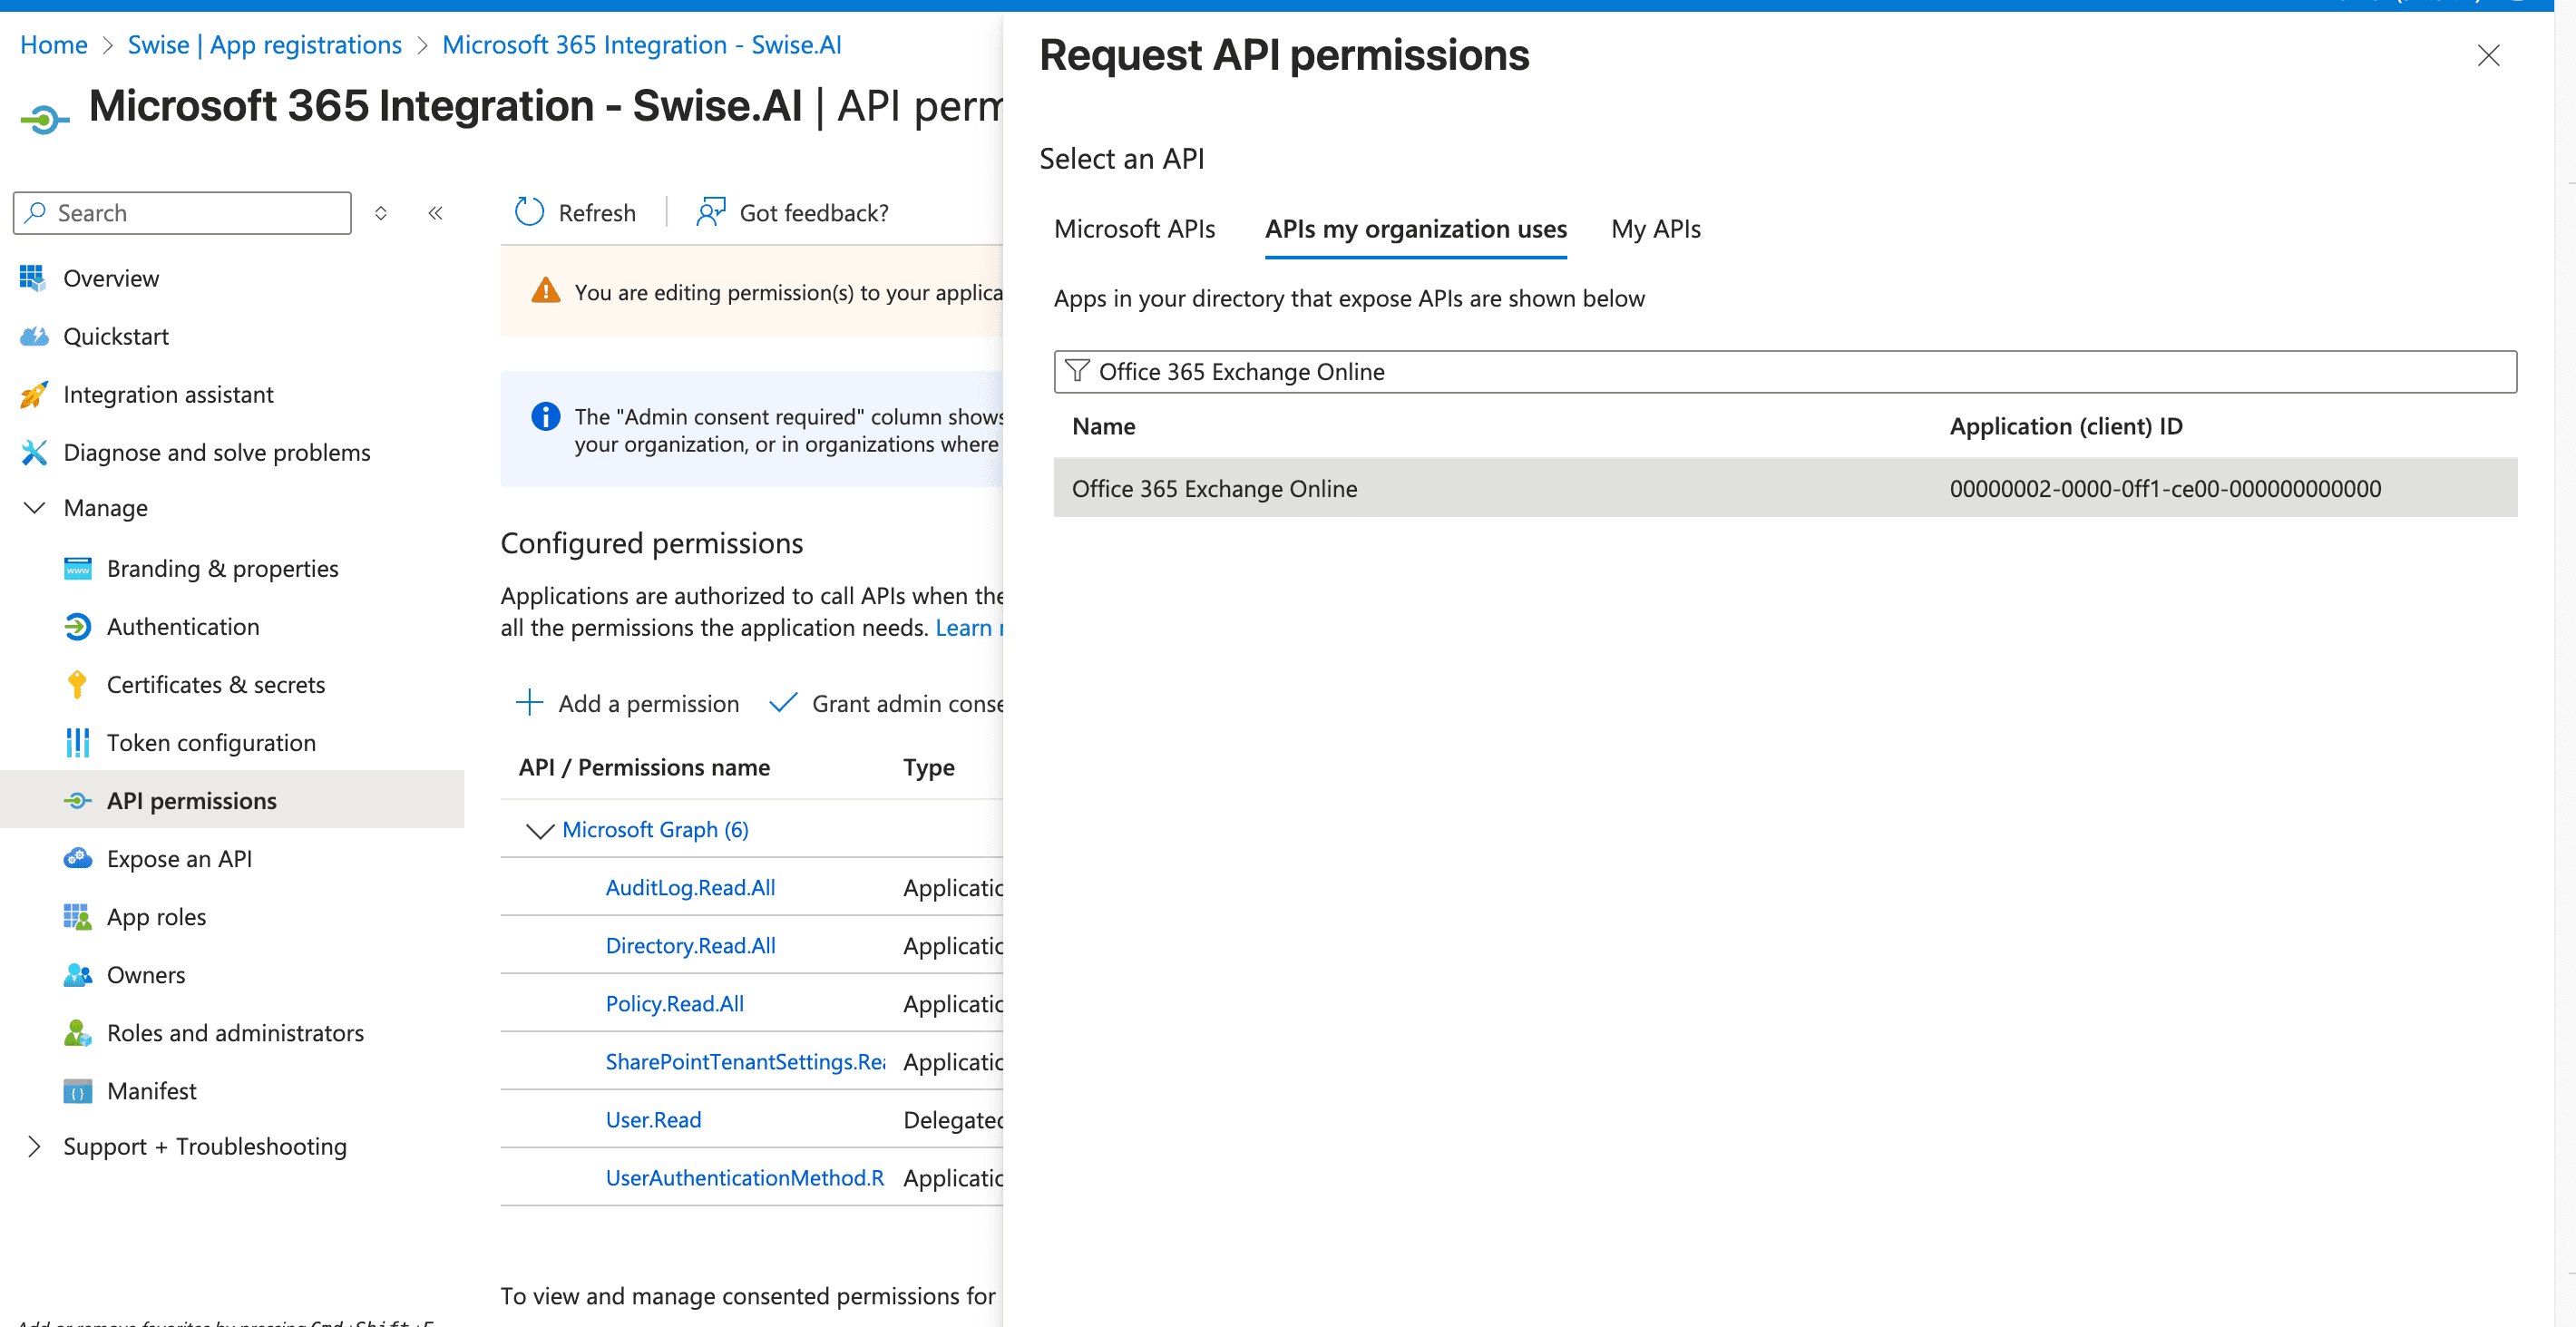
Add Exchange API
In API permissions, click + Add a permission
Select APIs my organisation uses and search for Office 365 Exchange Online
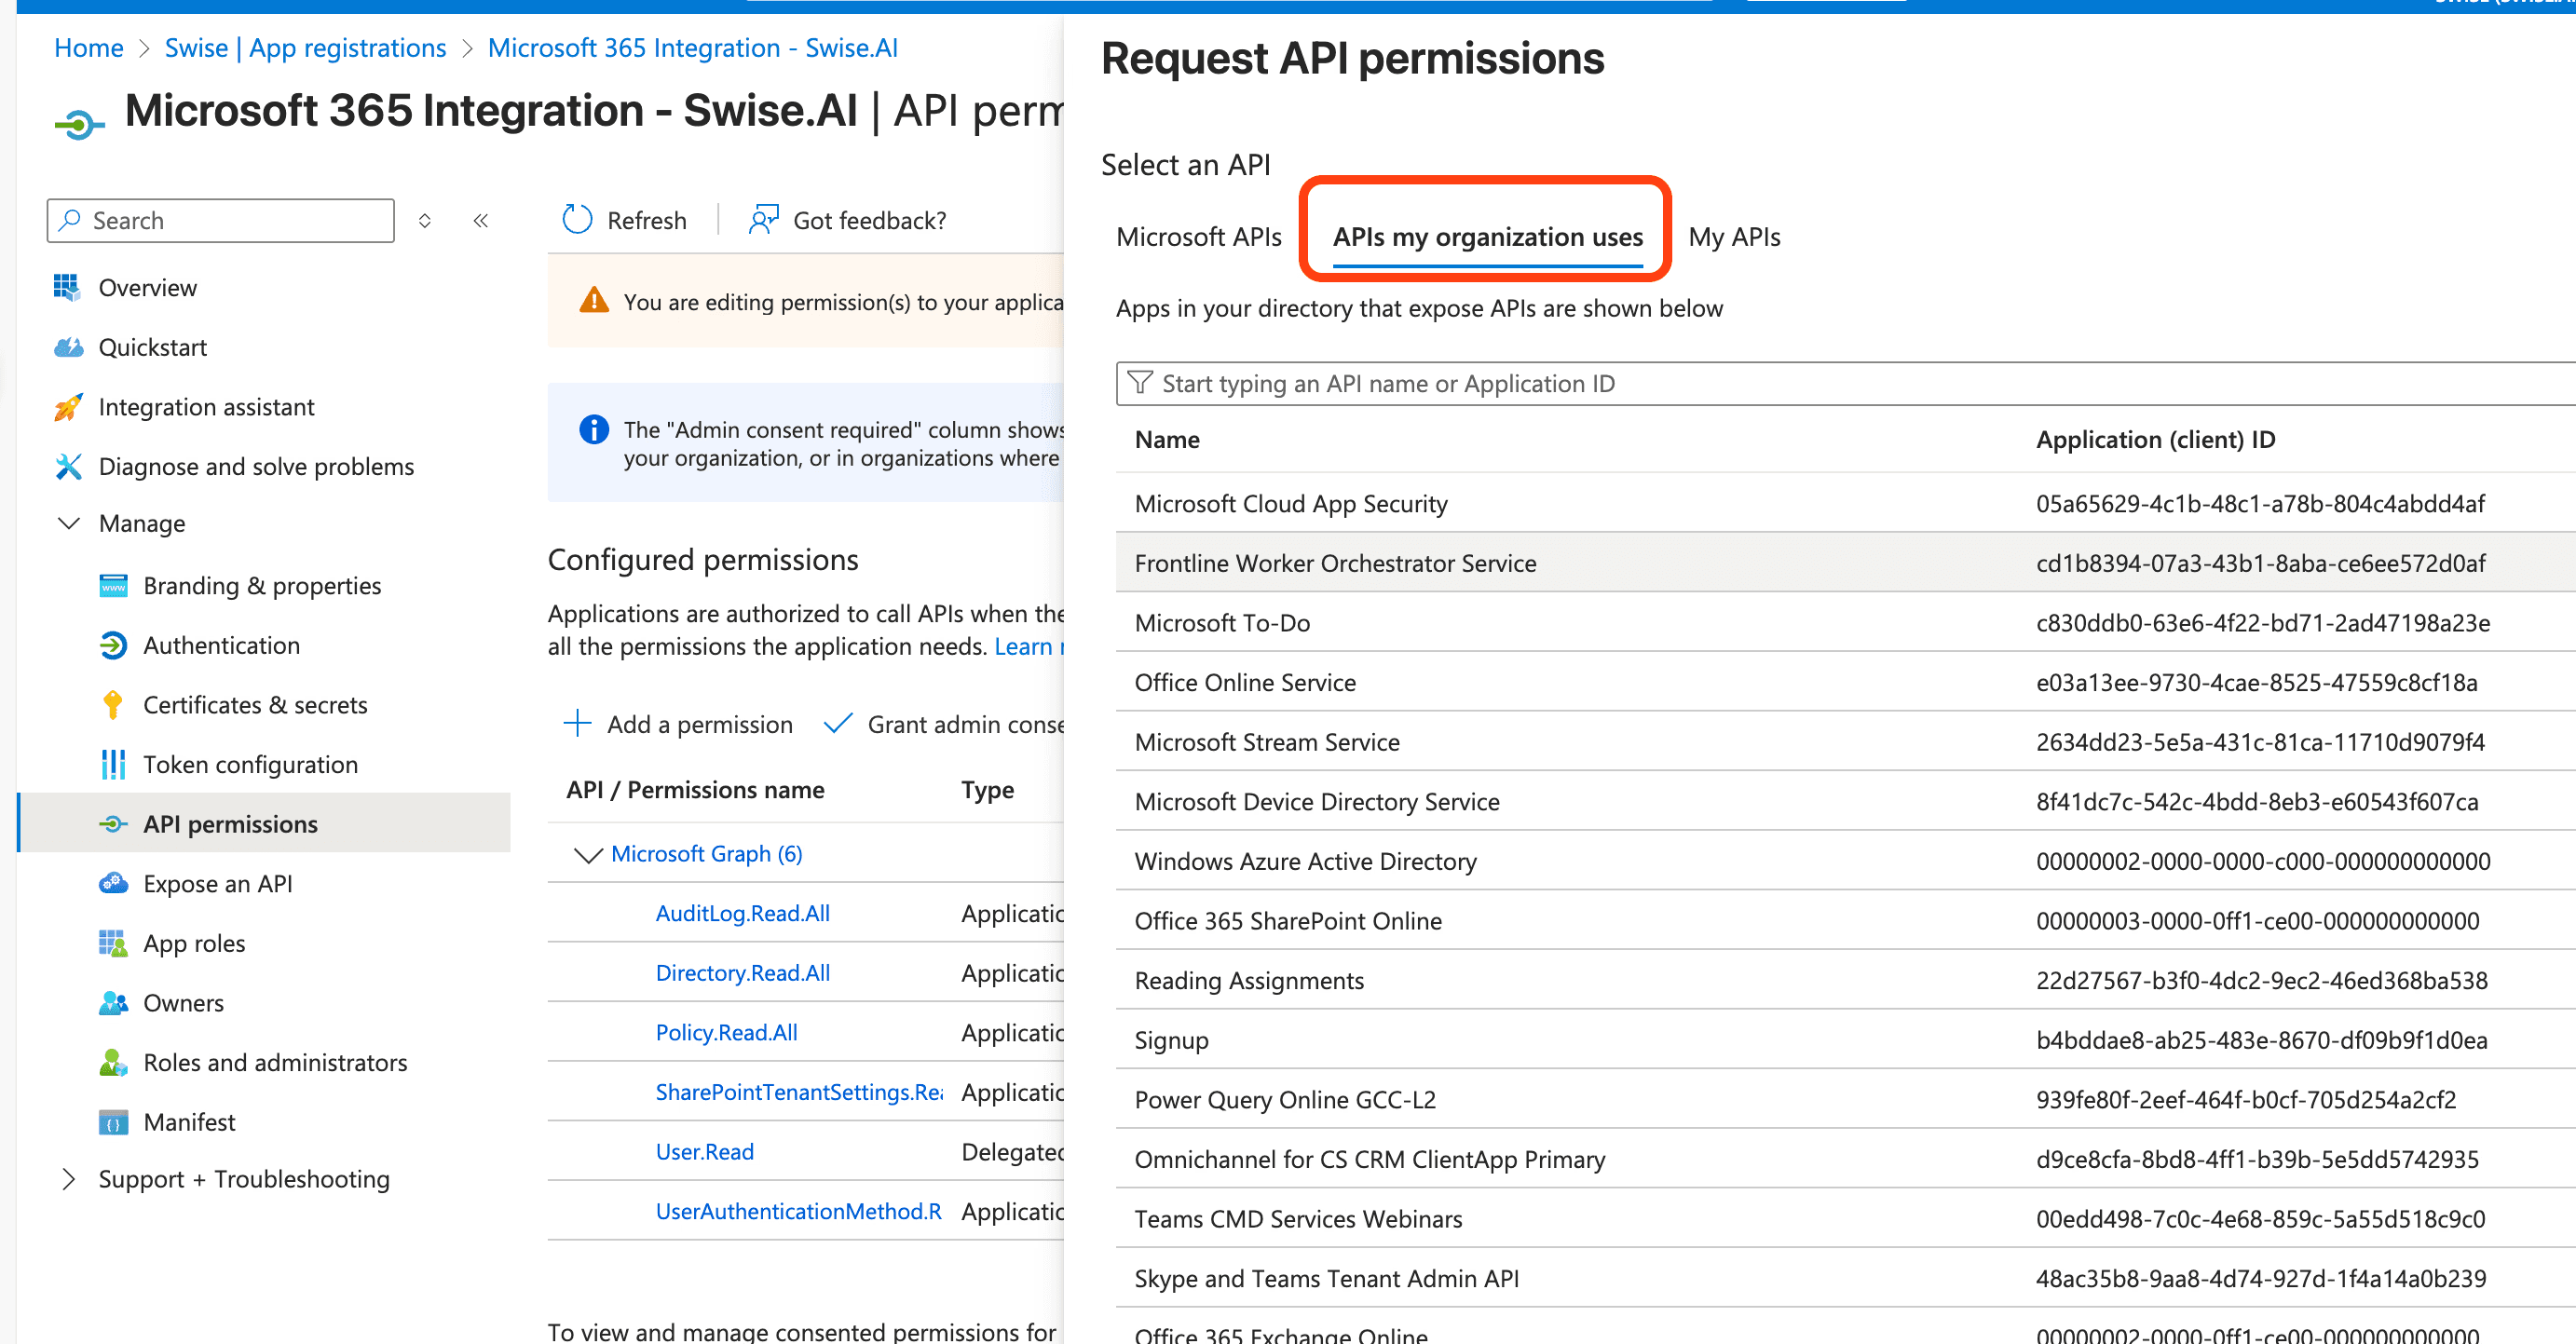
Select Office 365 Exchange Online and add Exchange.ManageAsApp permission
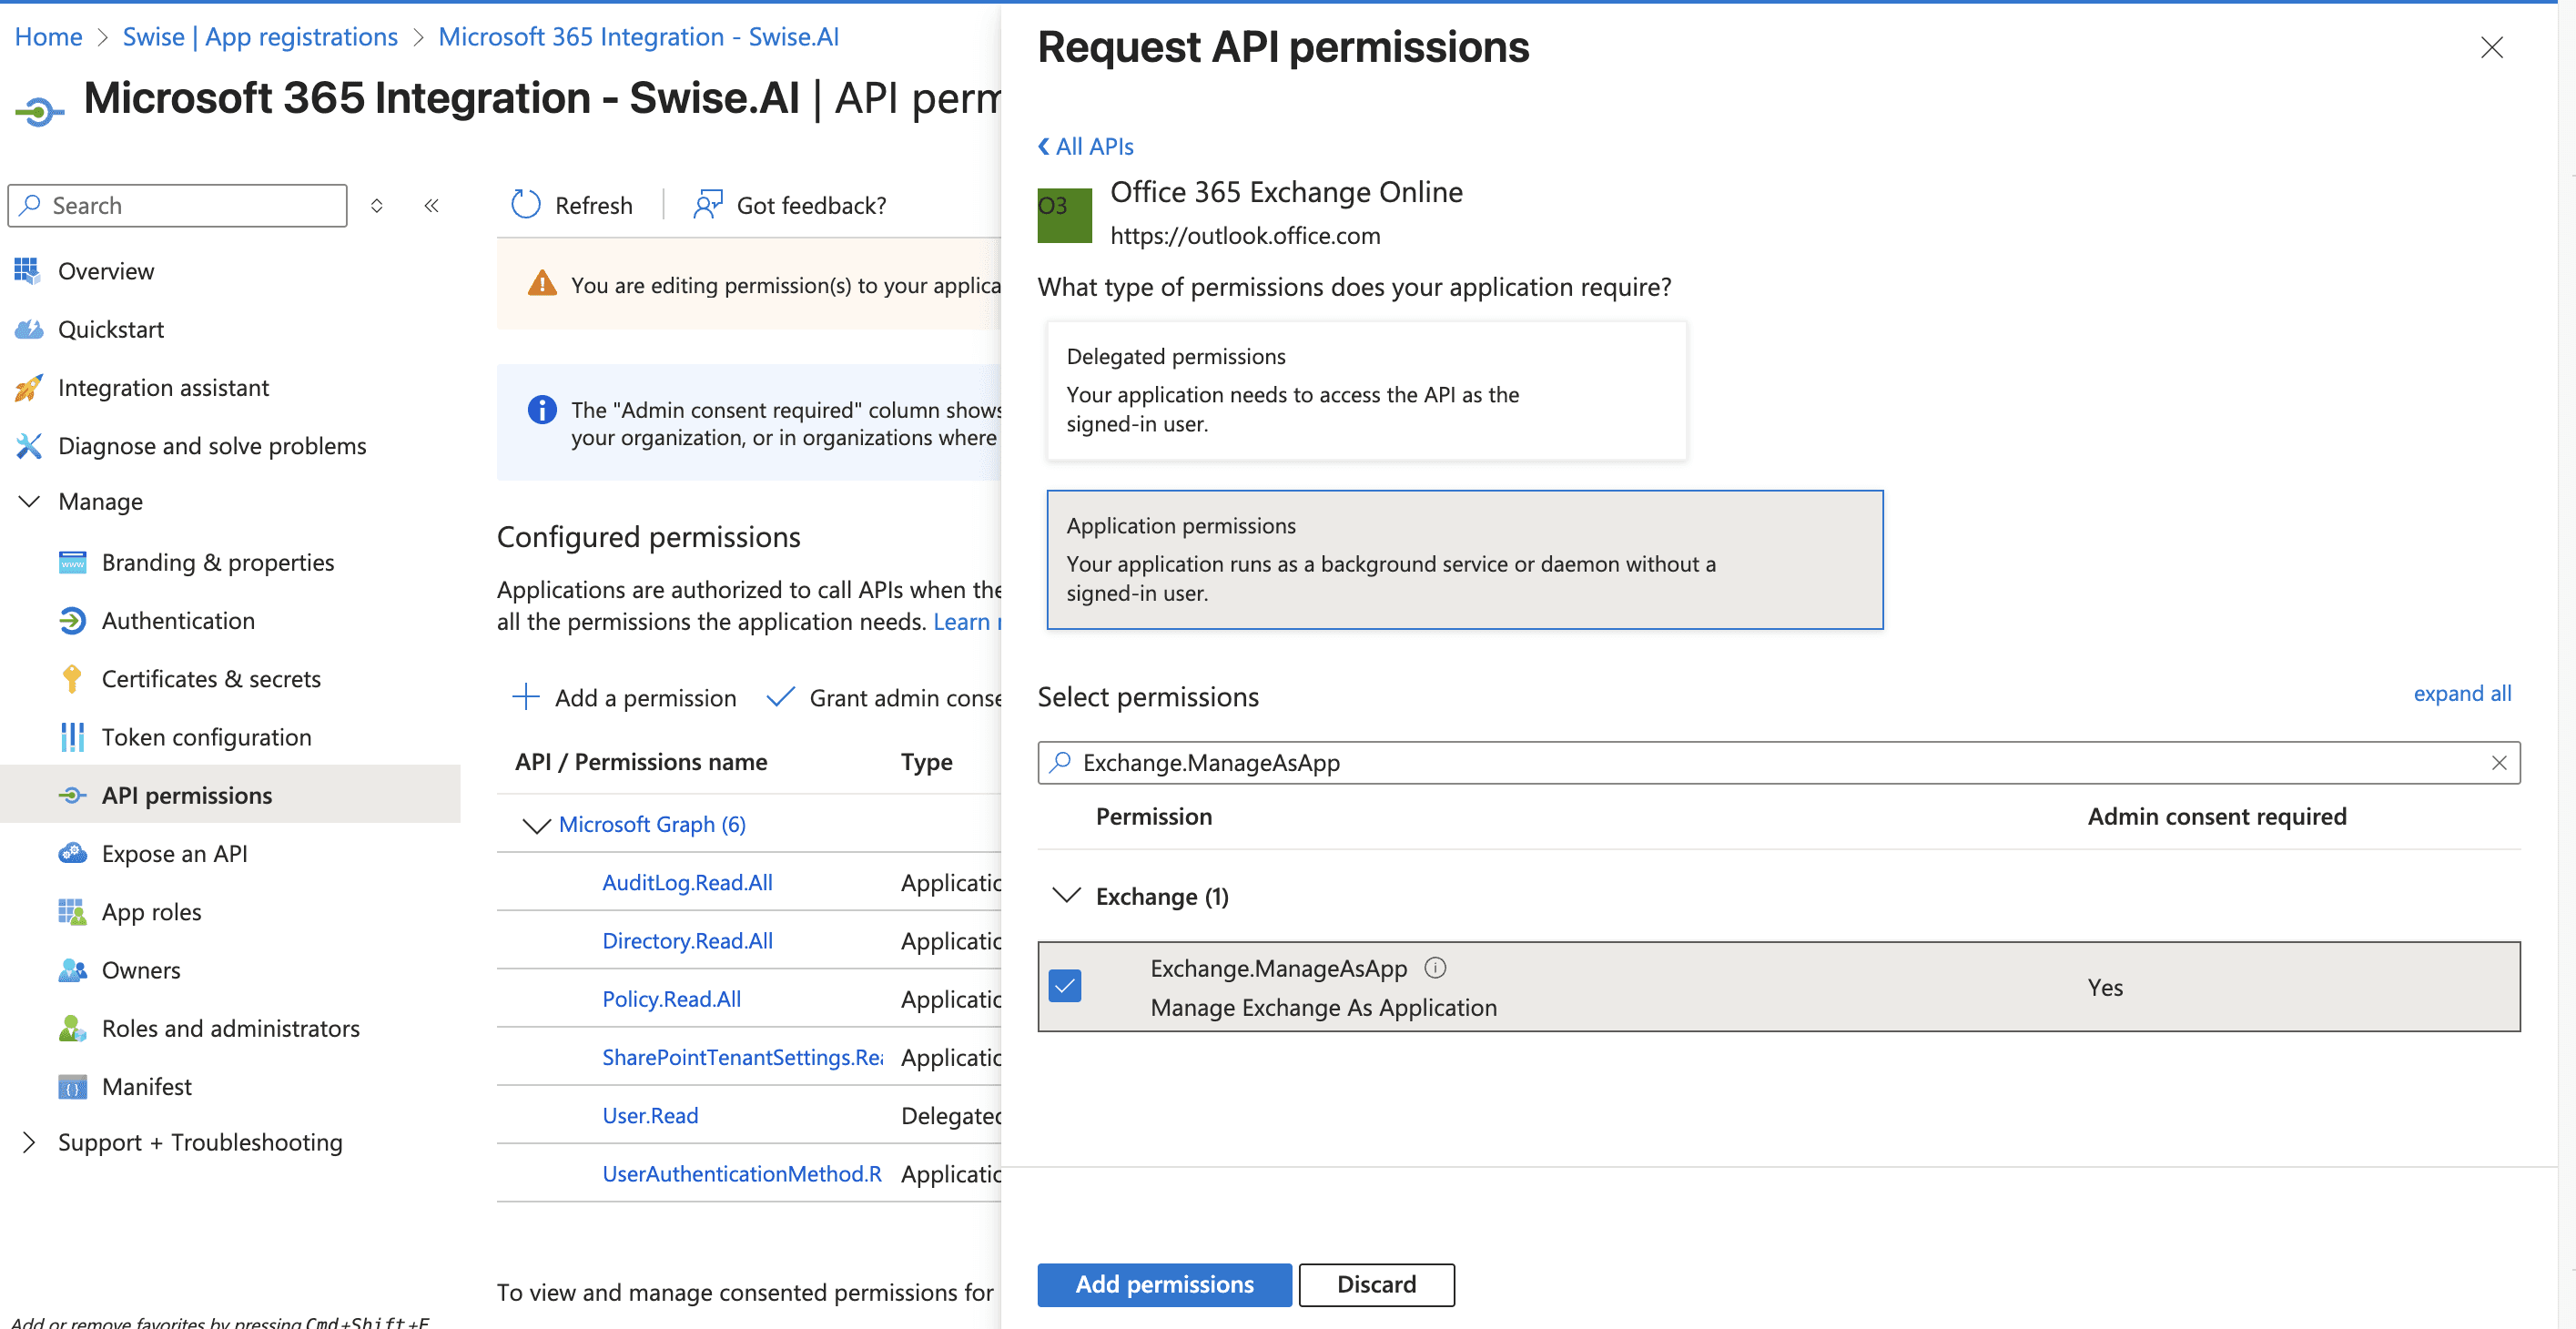
Grant admin consent
Microsoft Teams
Click + Add a permission again
Select APIs my organisation uses and search for Skype and Teams Tenant Admin API
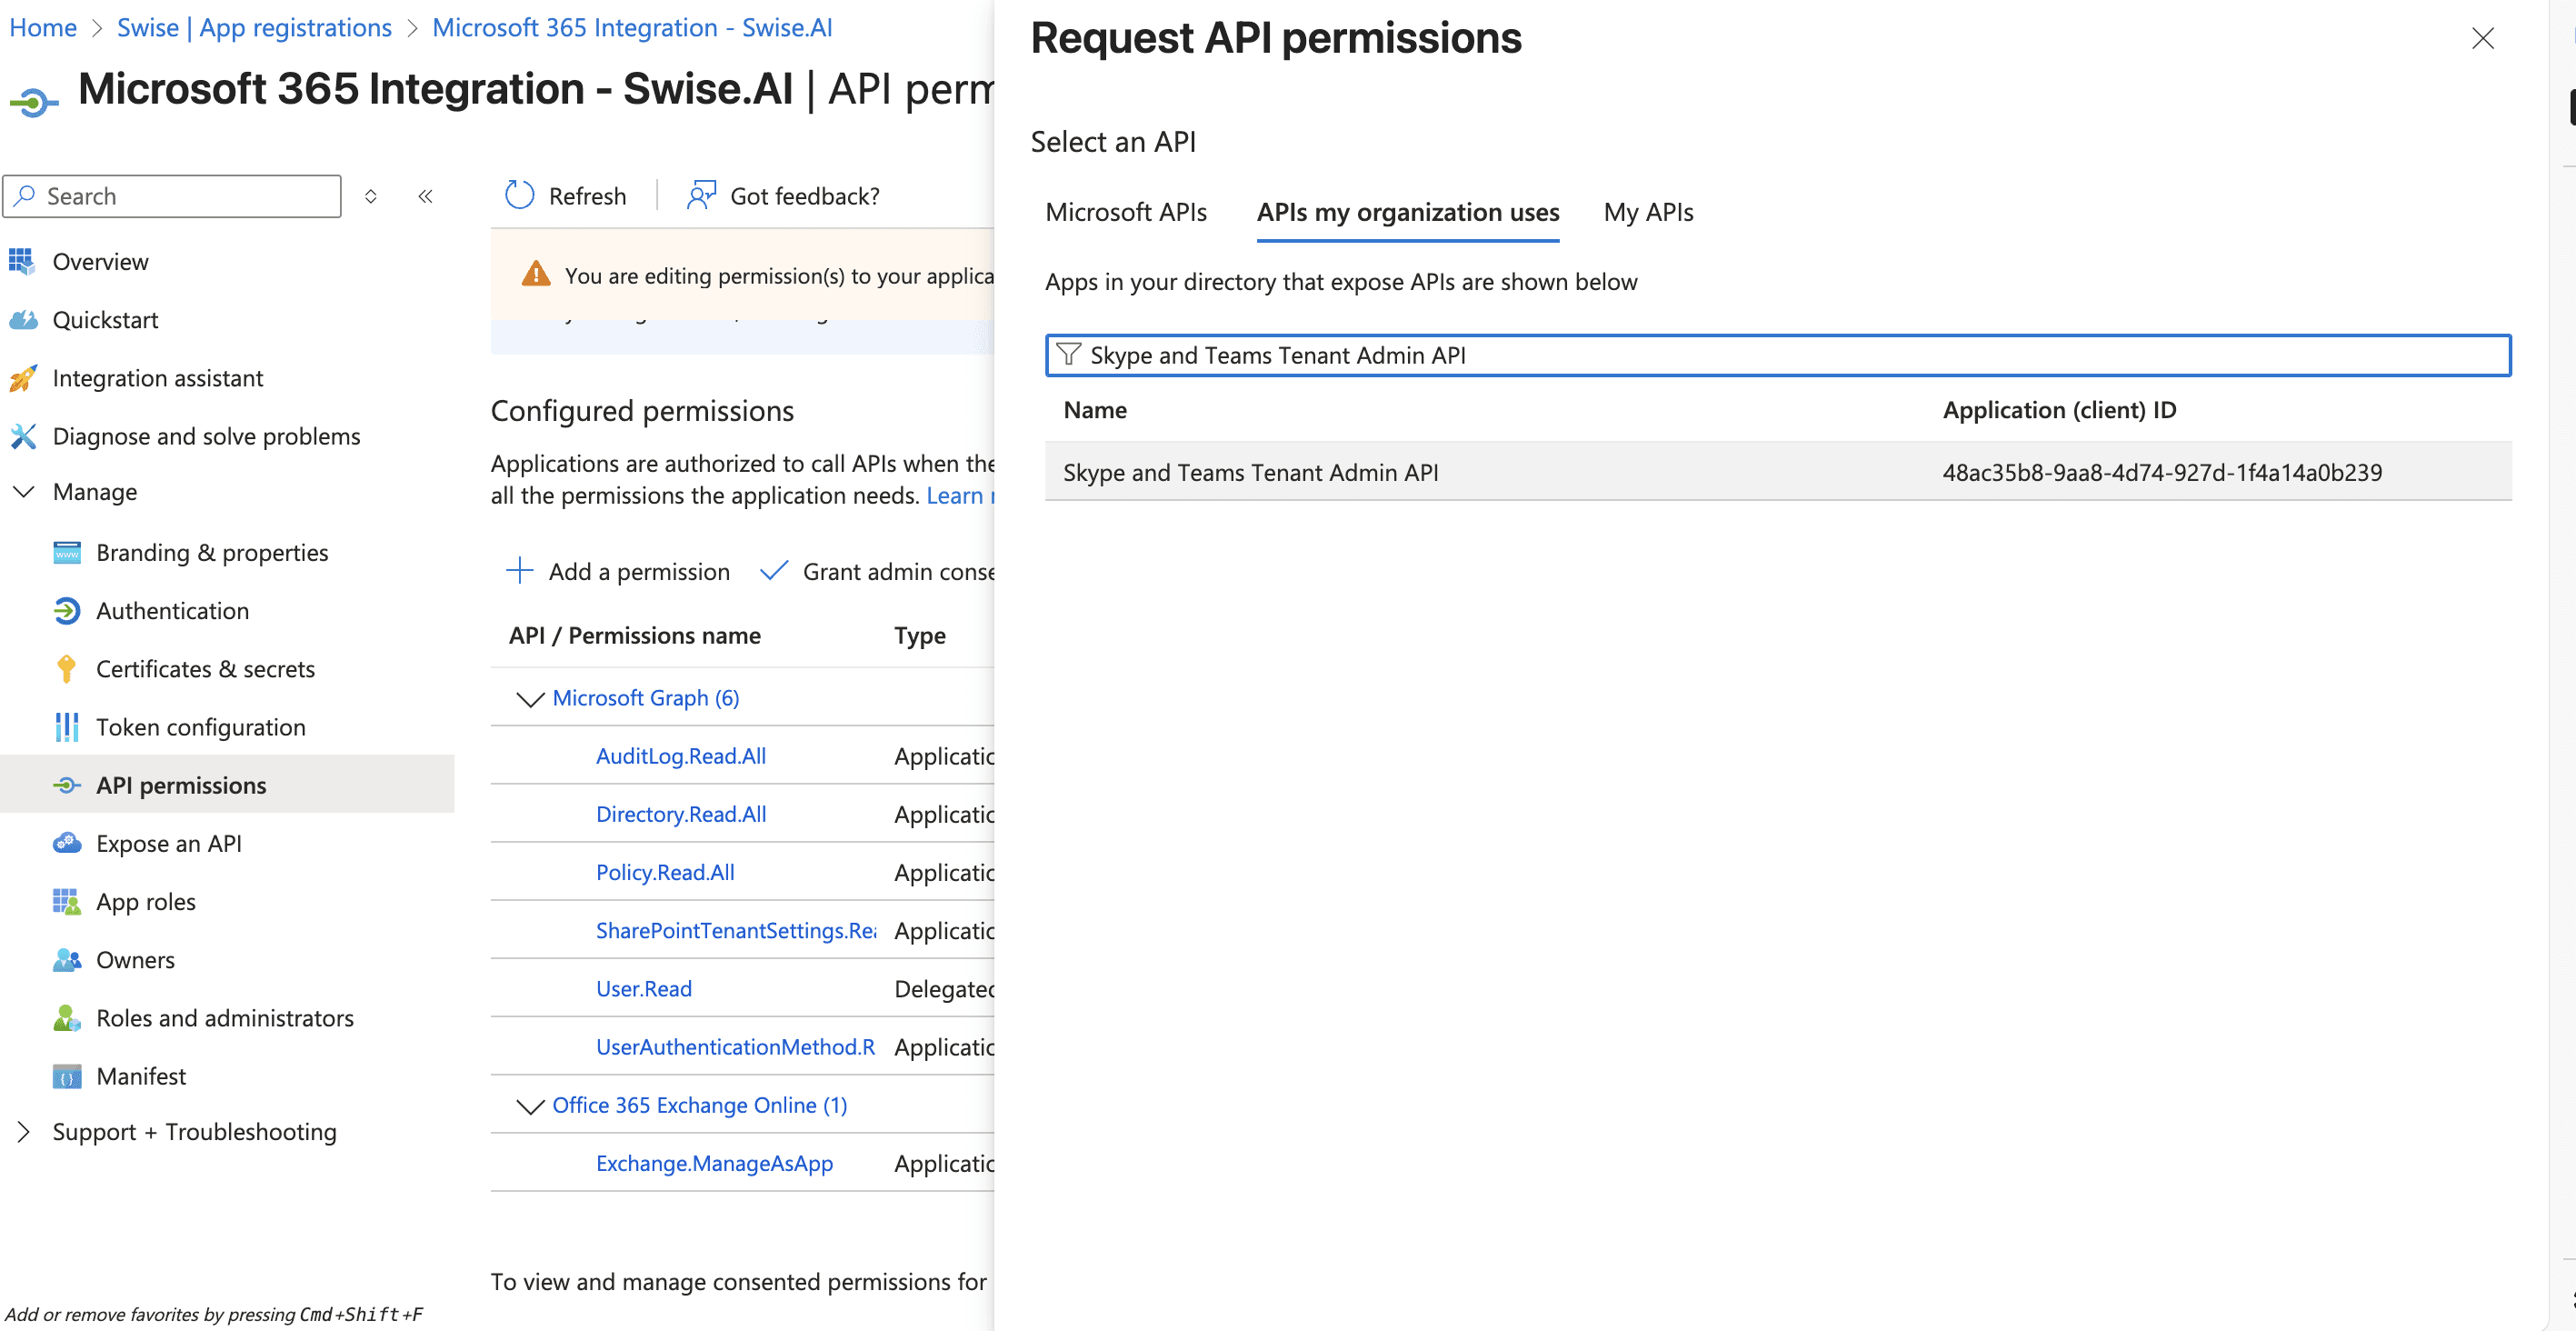
Add application_access permission
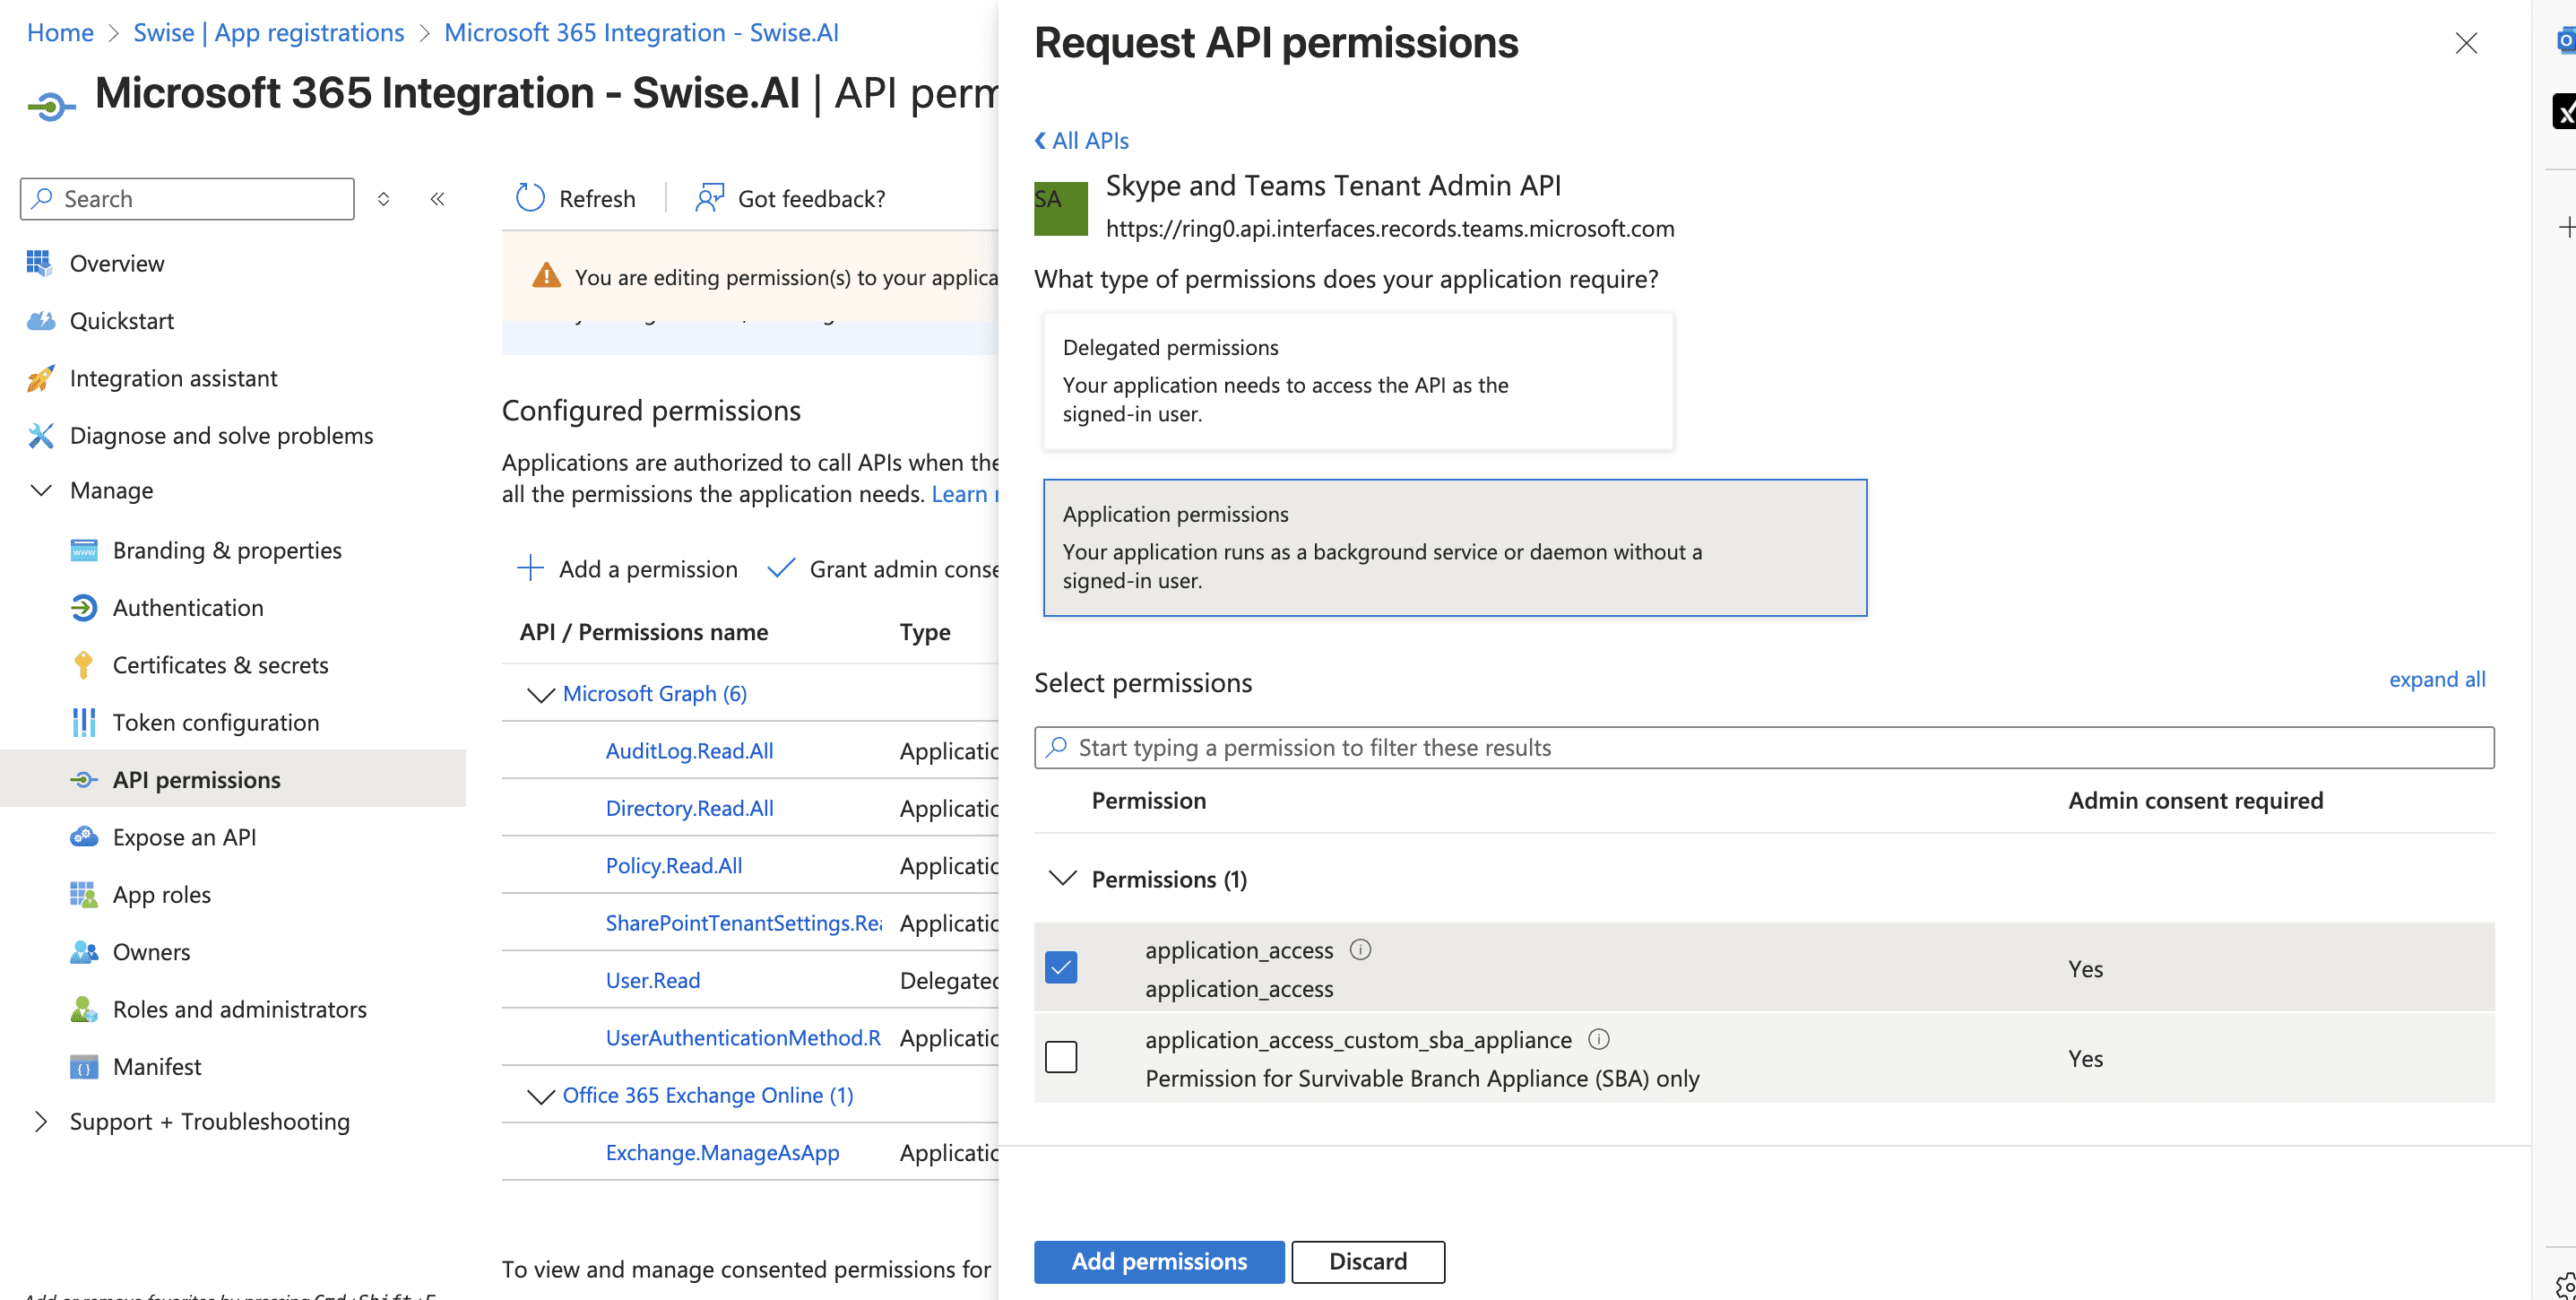
Grant admin consent
Final permissions should look like this:
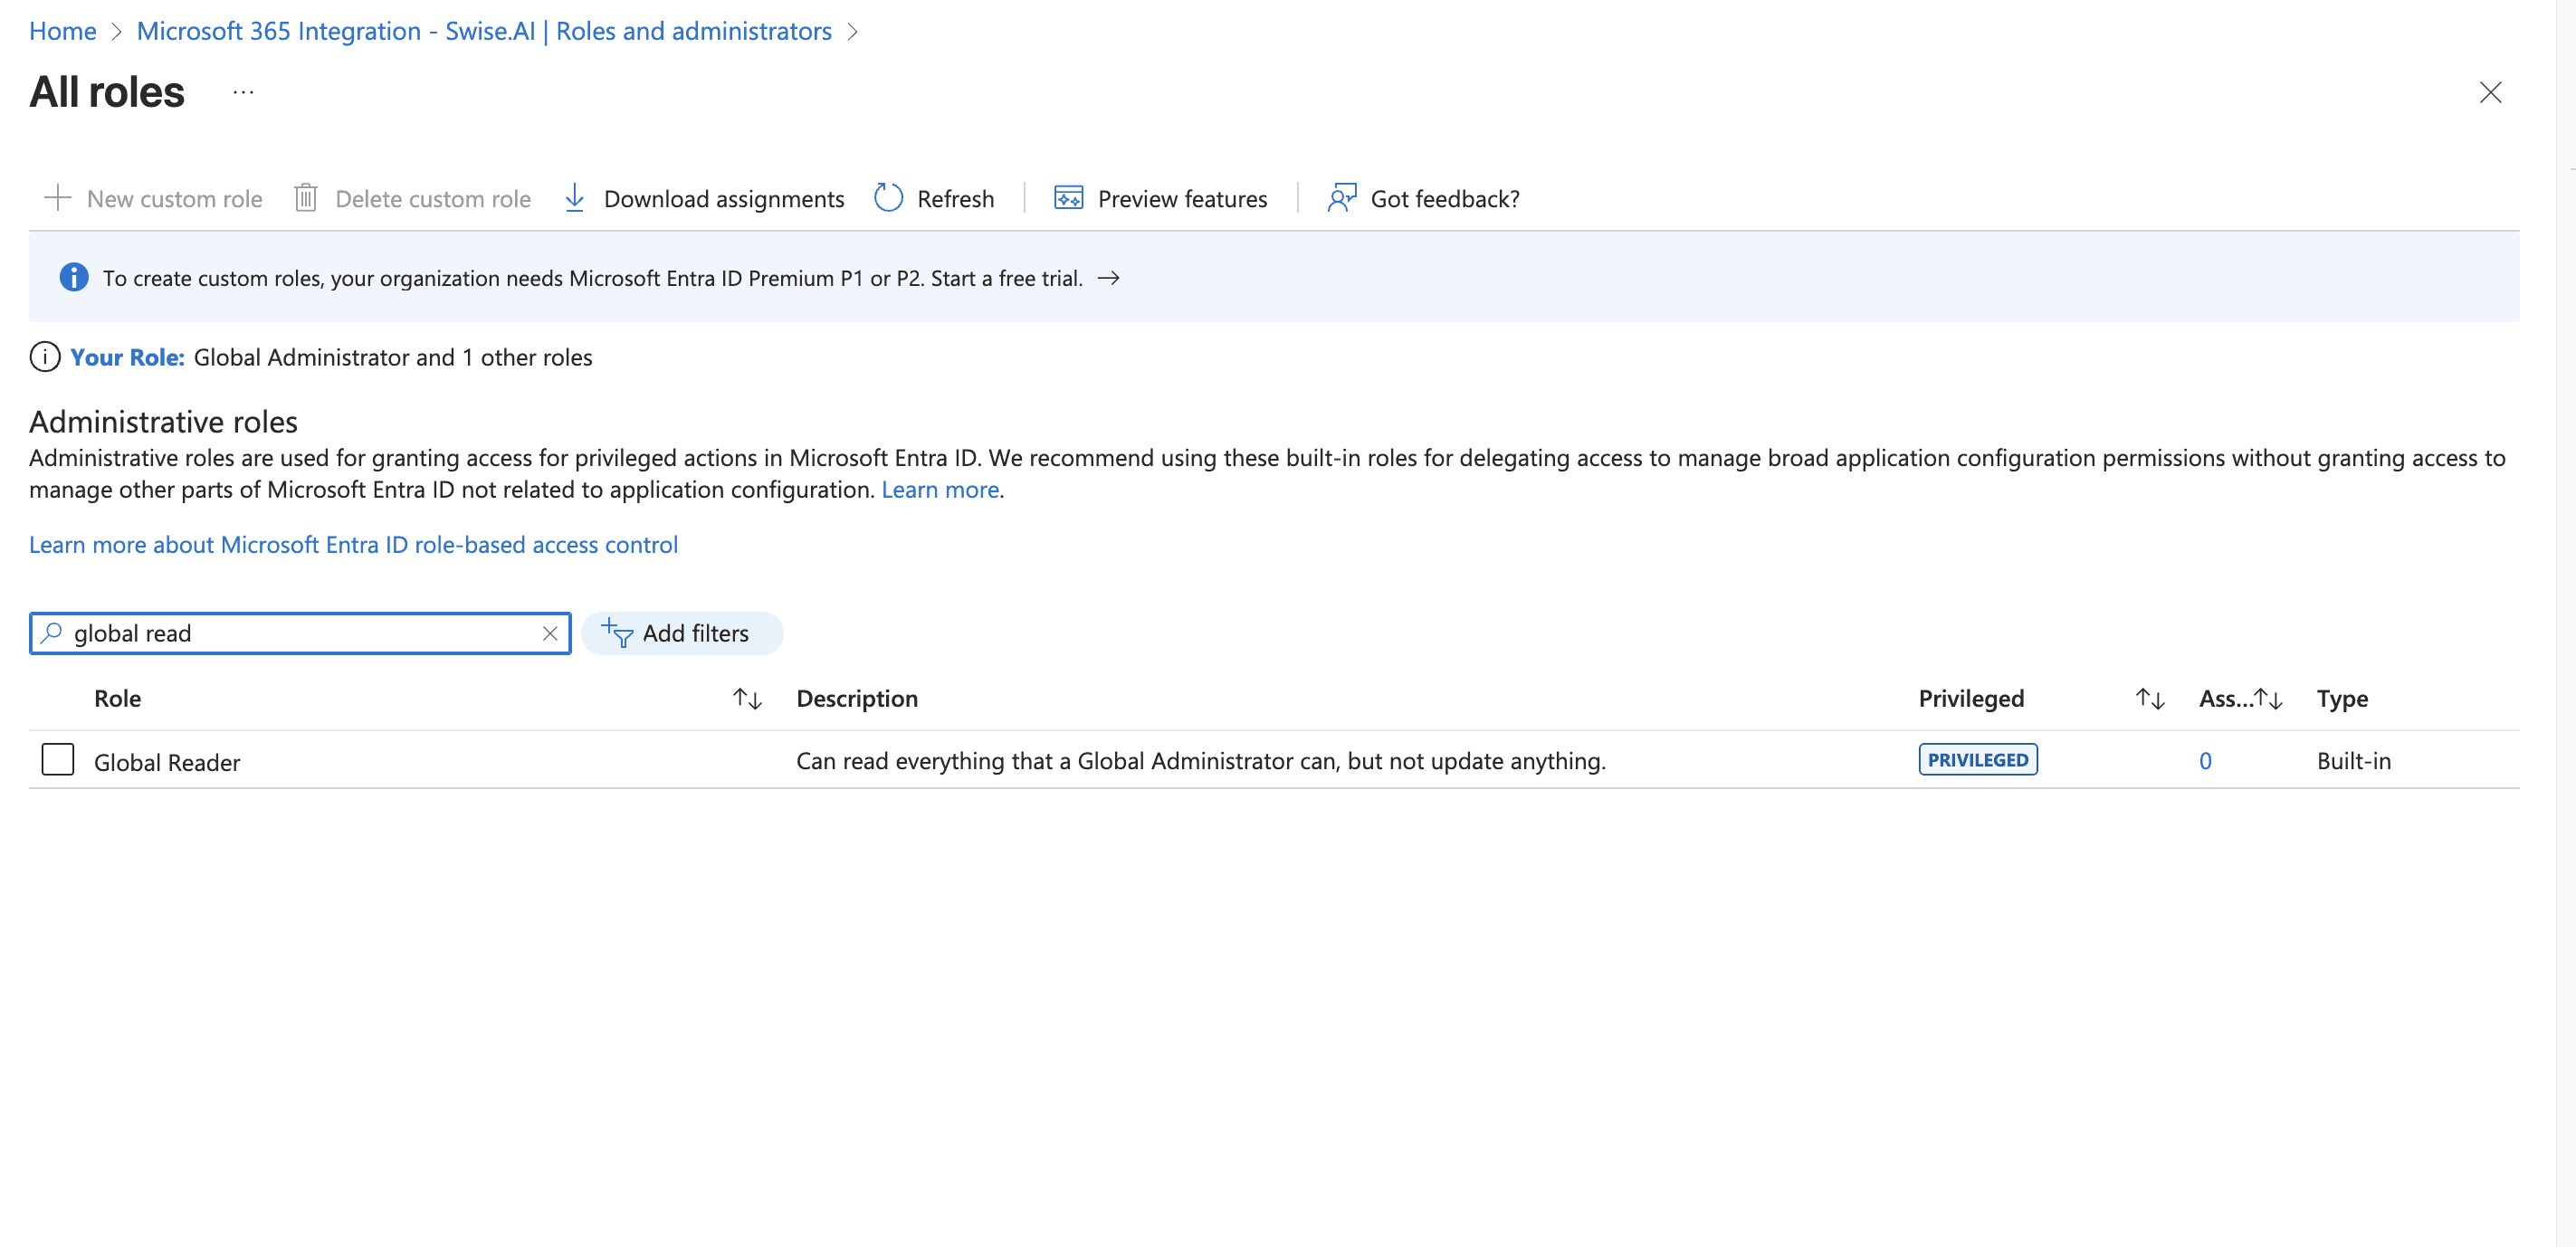
Assign Global Reader Role
Your Service Principal needs the Global Reader role:
Assign
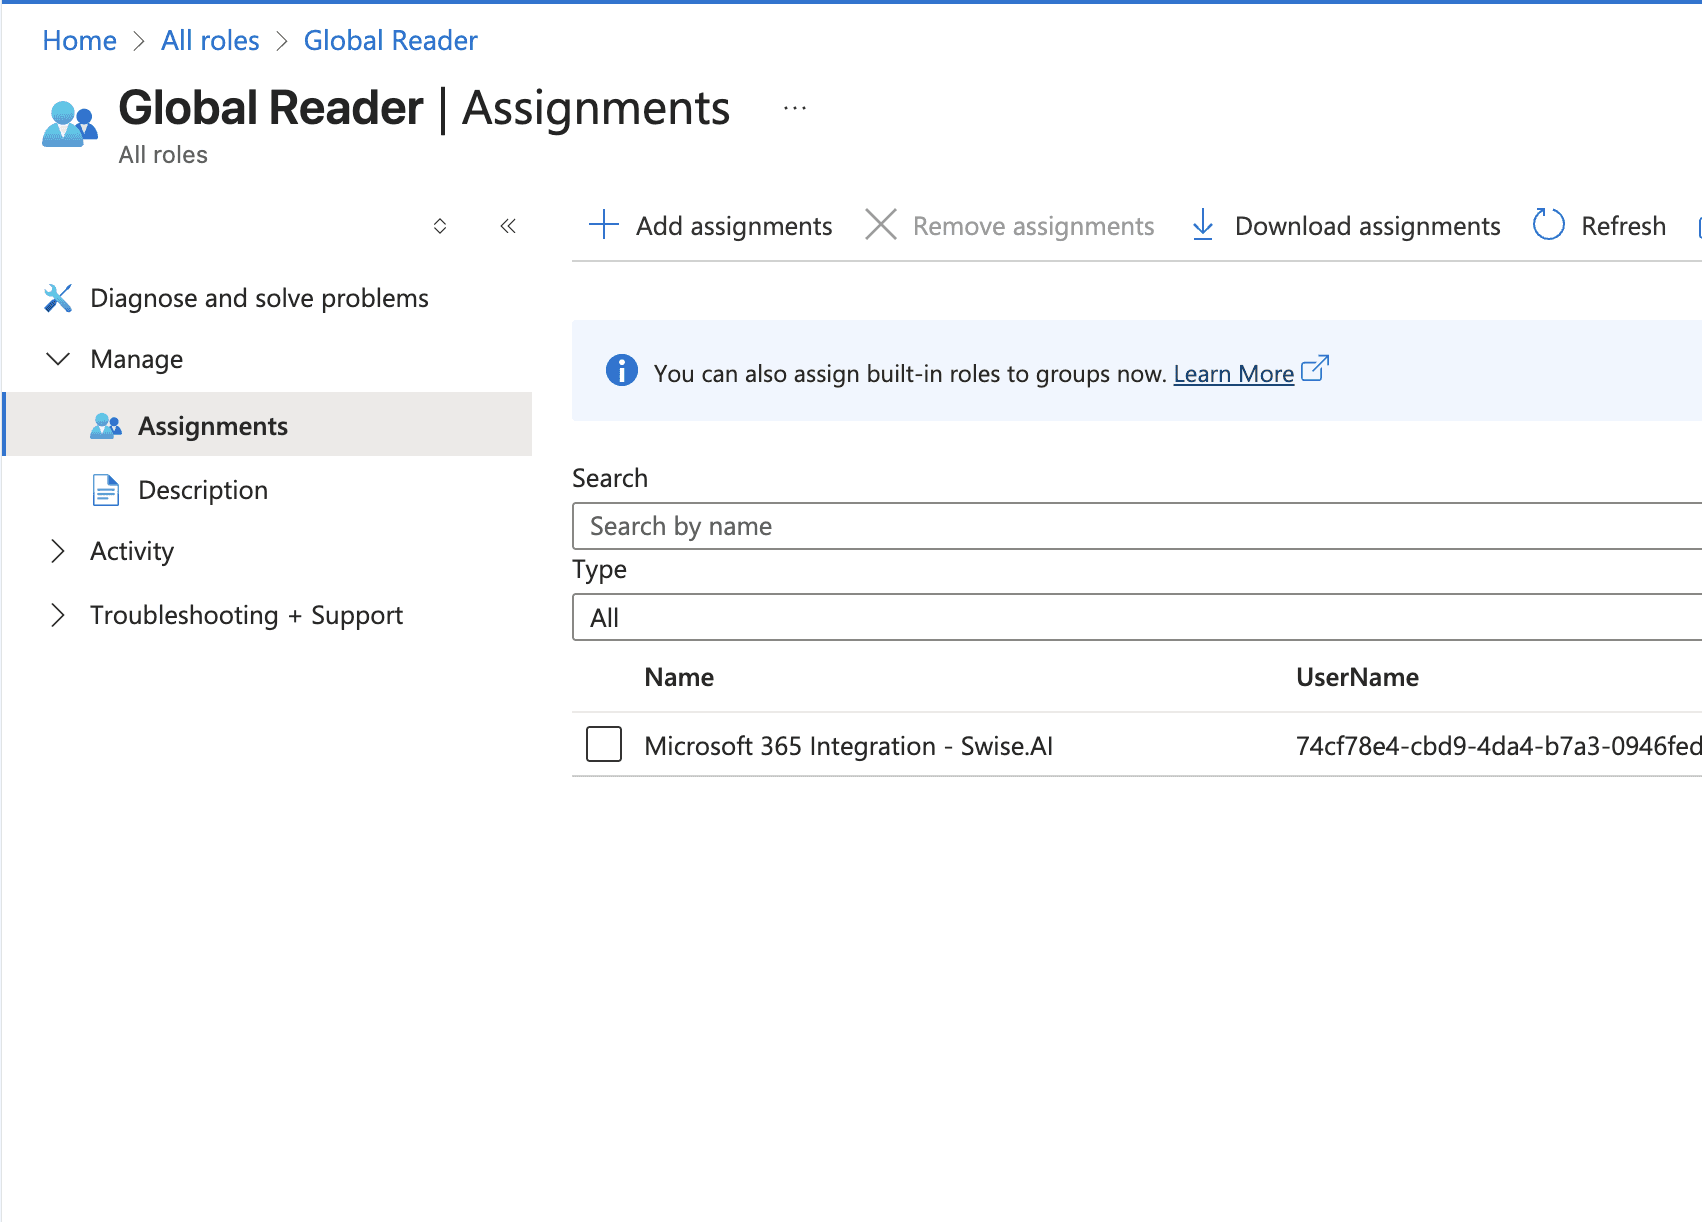
Global Readerrole to the app: Go toRoles and administrators> clickherefor directory level assignment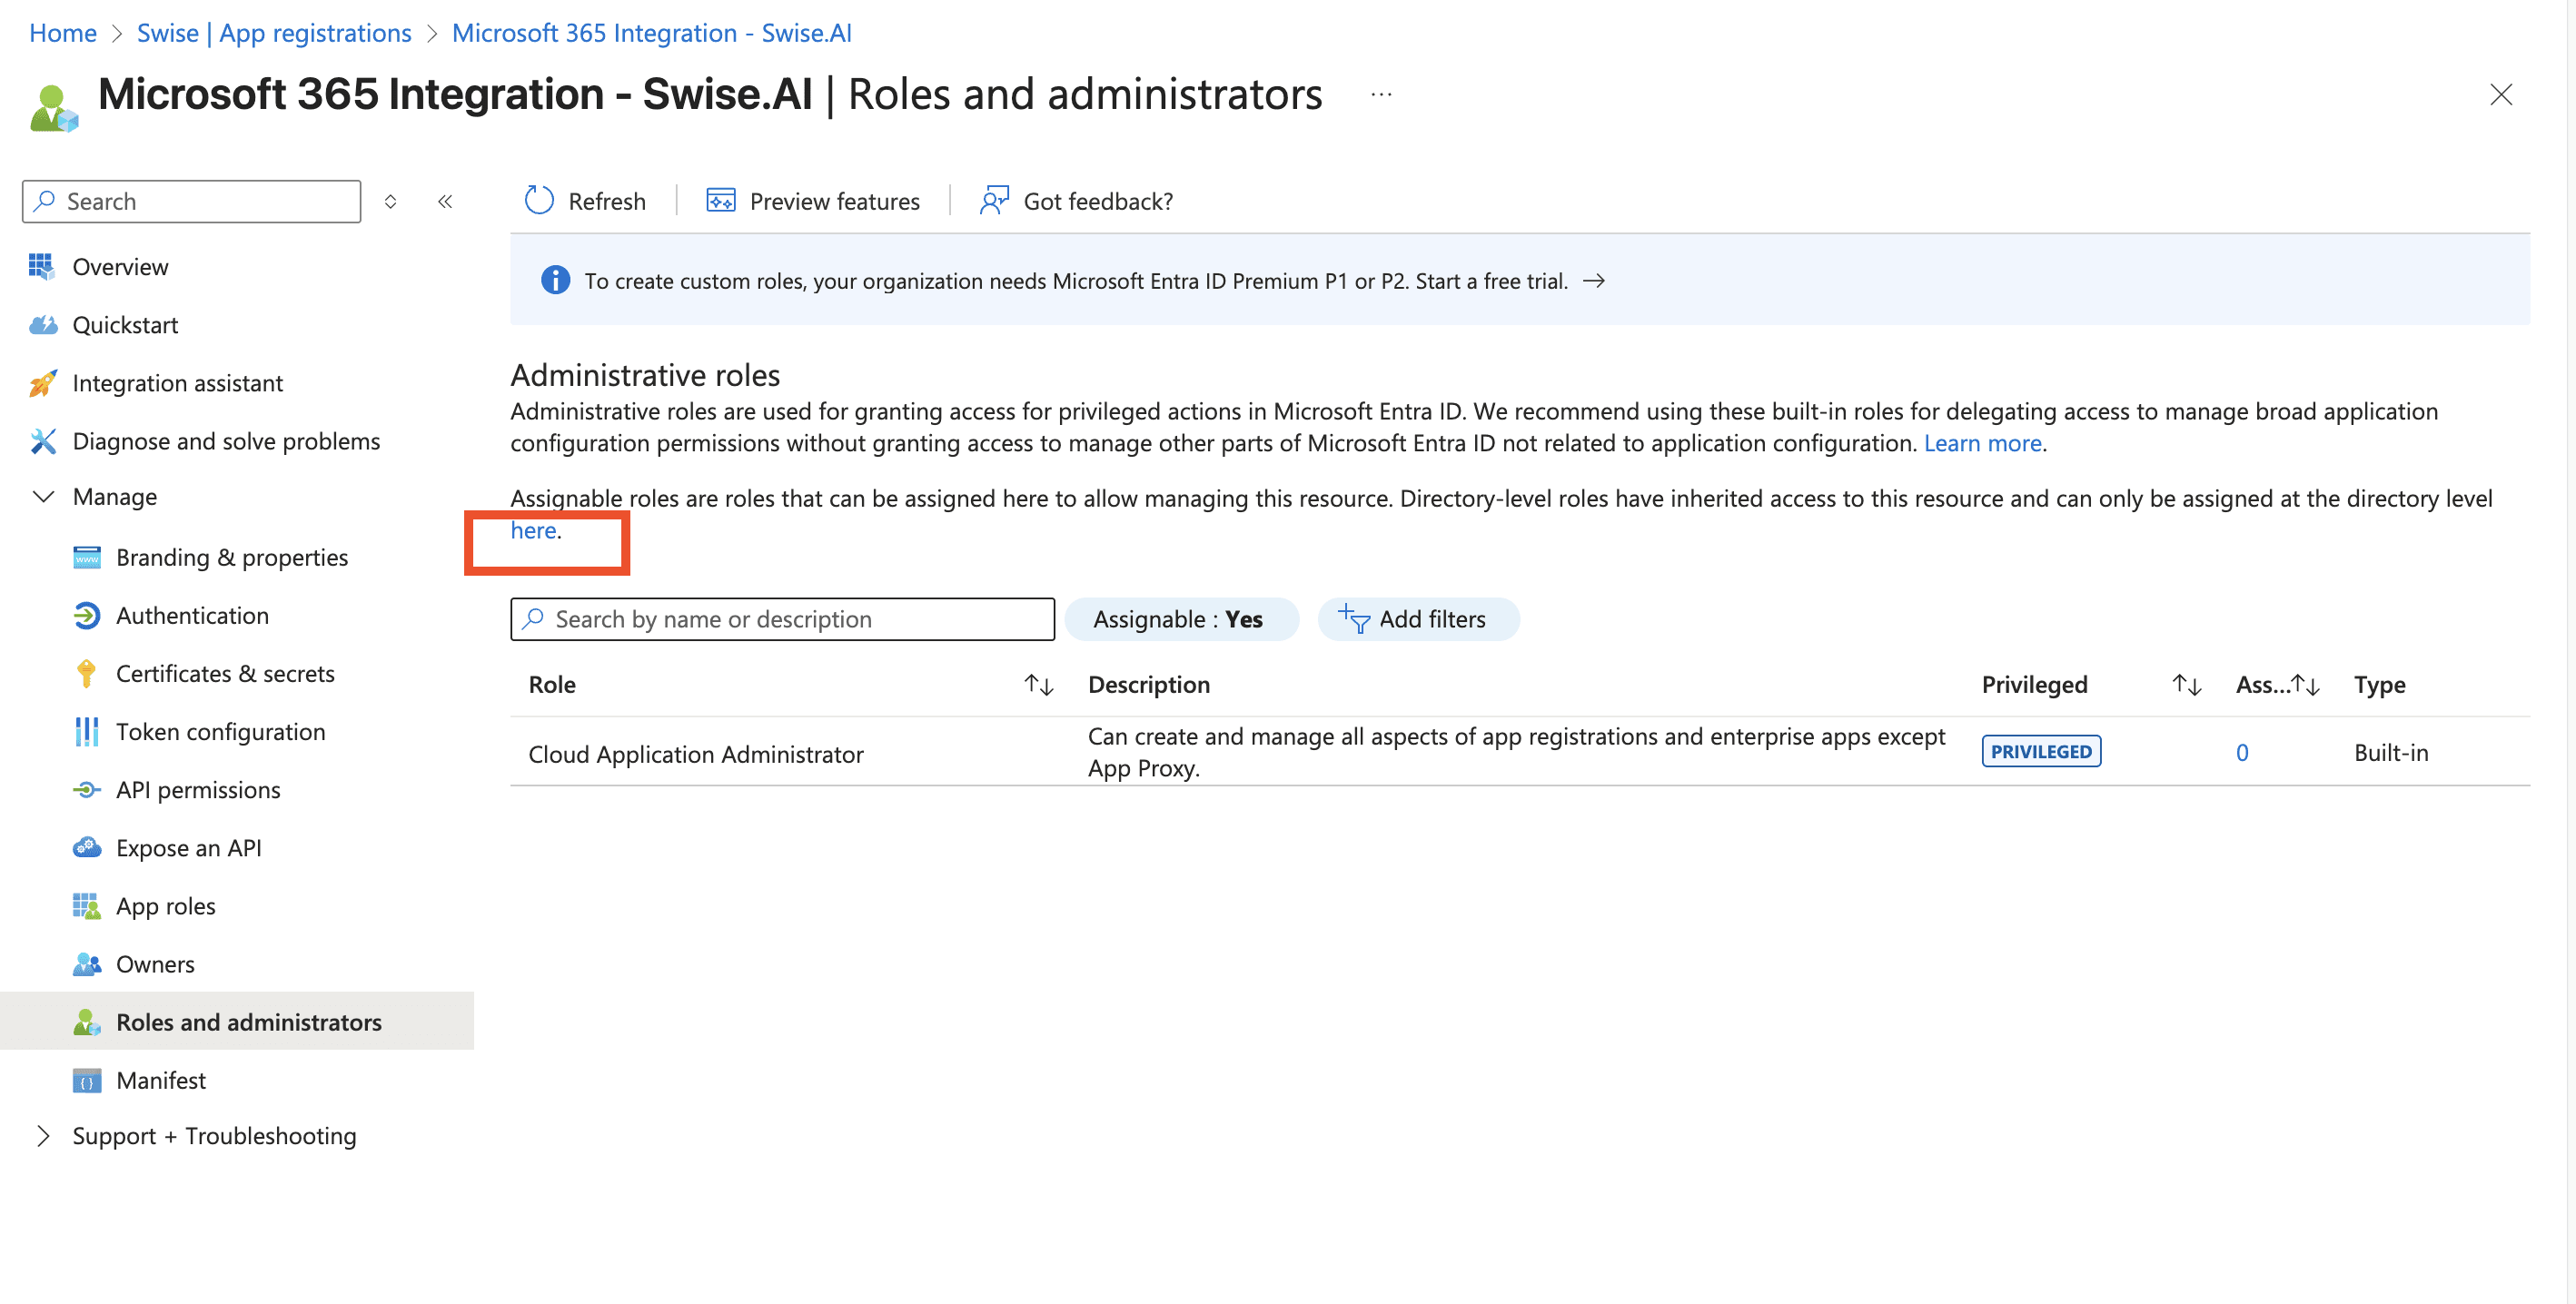
Search for and select Global Reader
Click + Add assignments
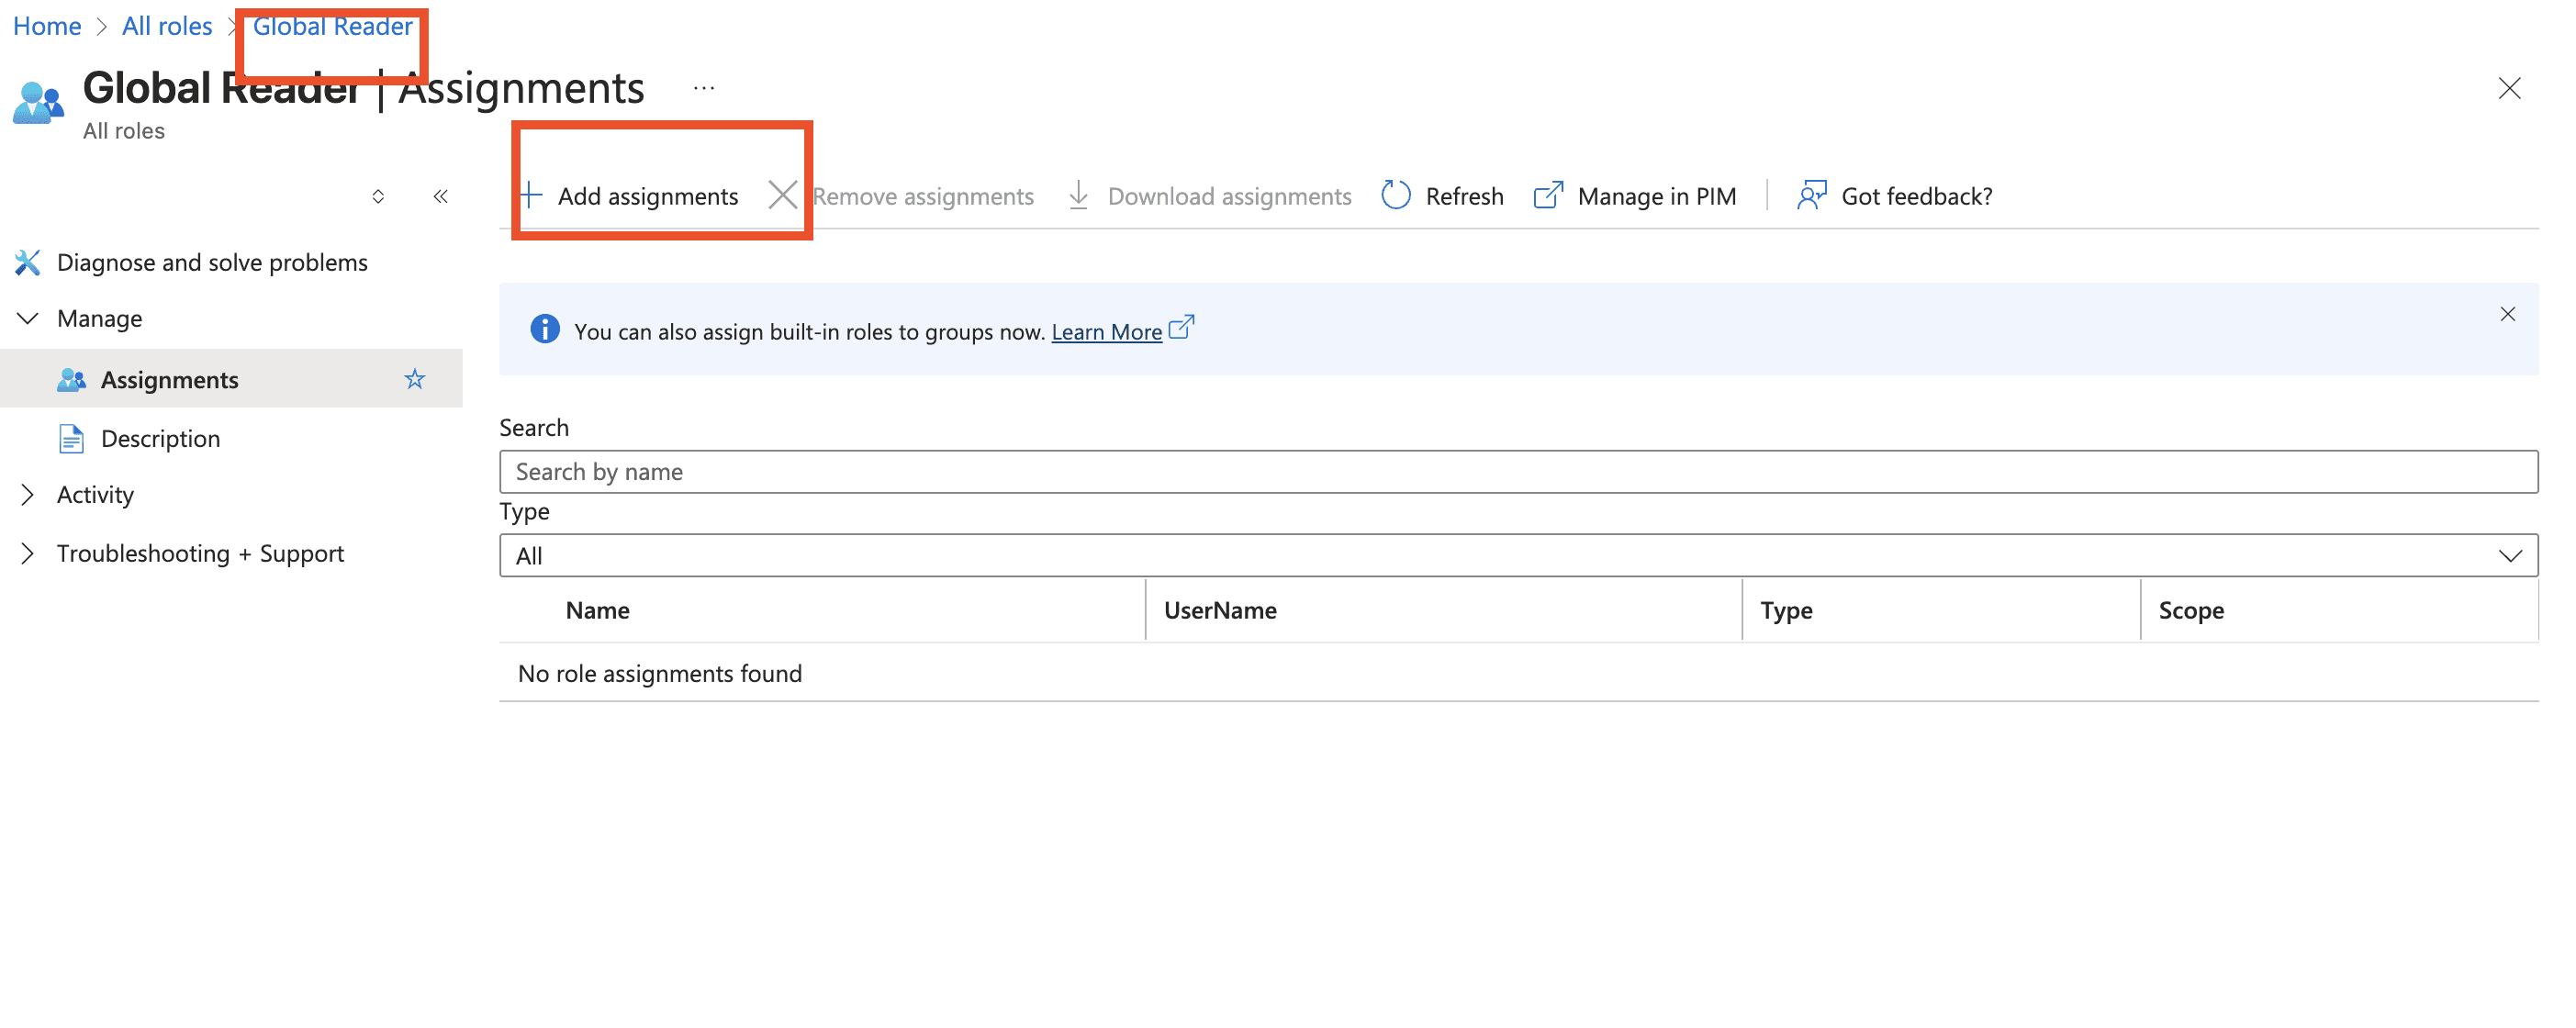
Select your Swise M365 app and click Add
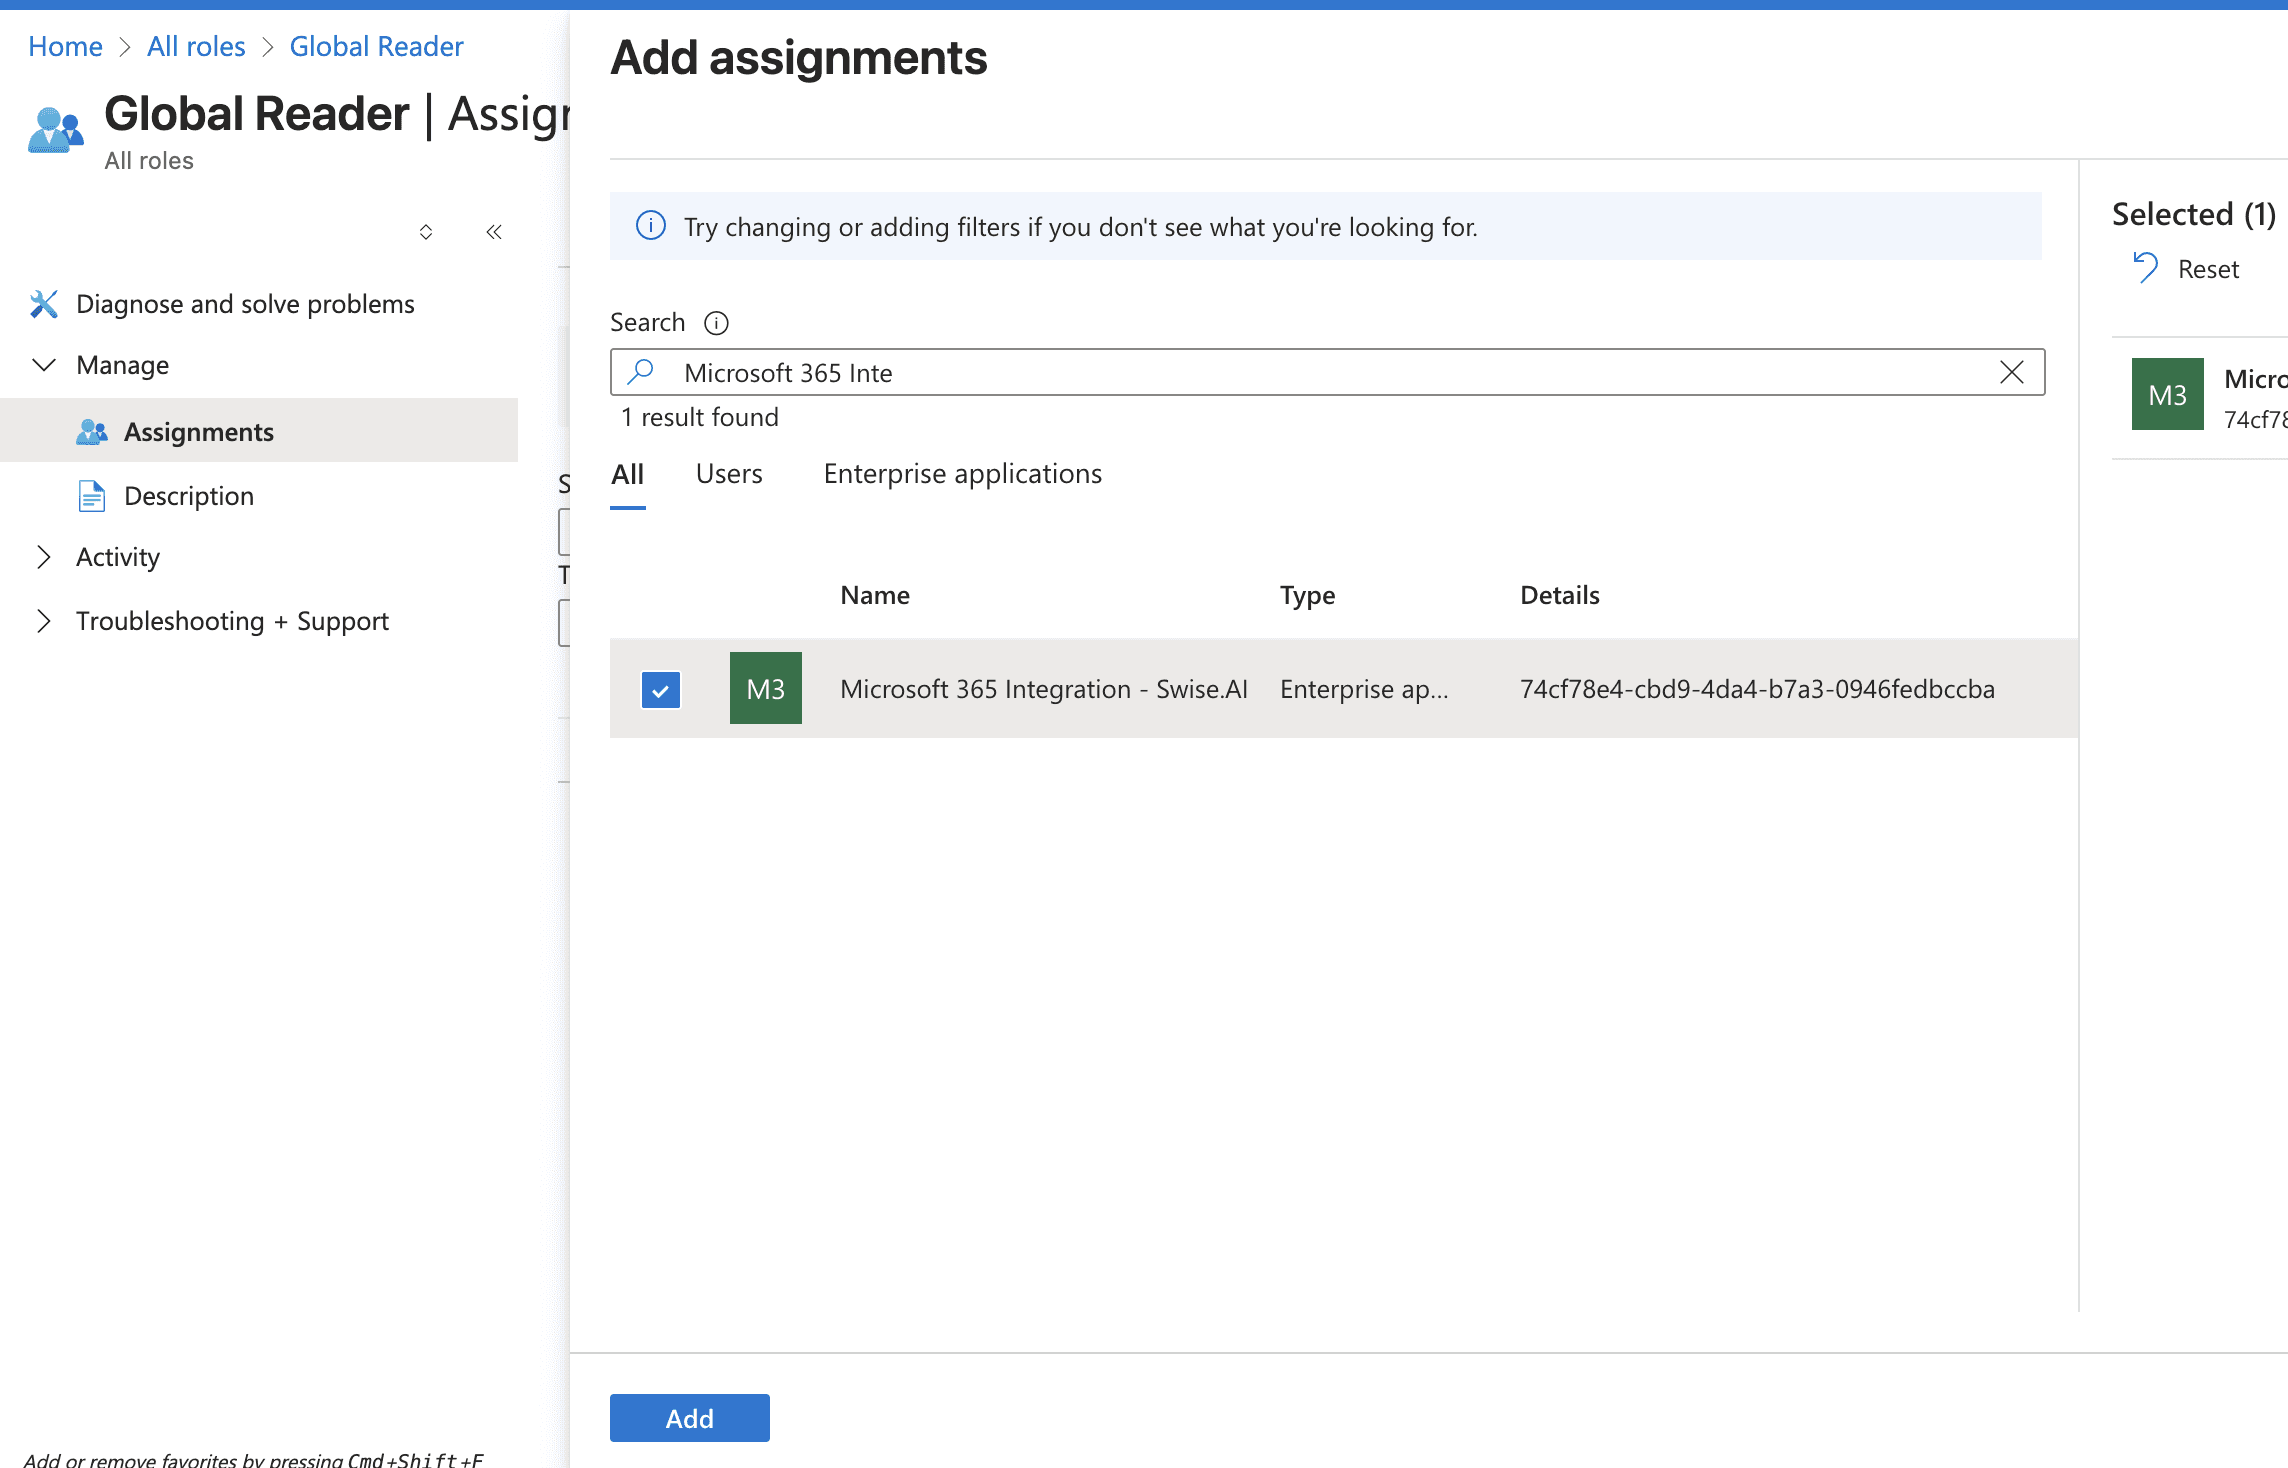
Add the assignment
💡 Note: The Global Reader role provides read-only access to all Microsoft 365 services and is required for comprehensive security monitoring.
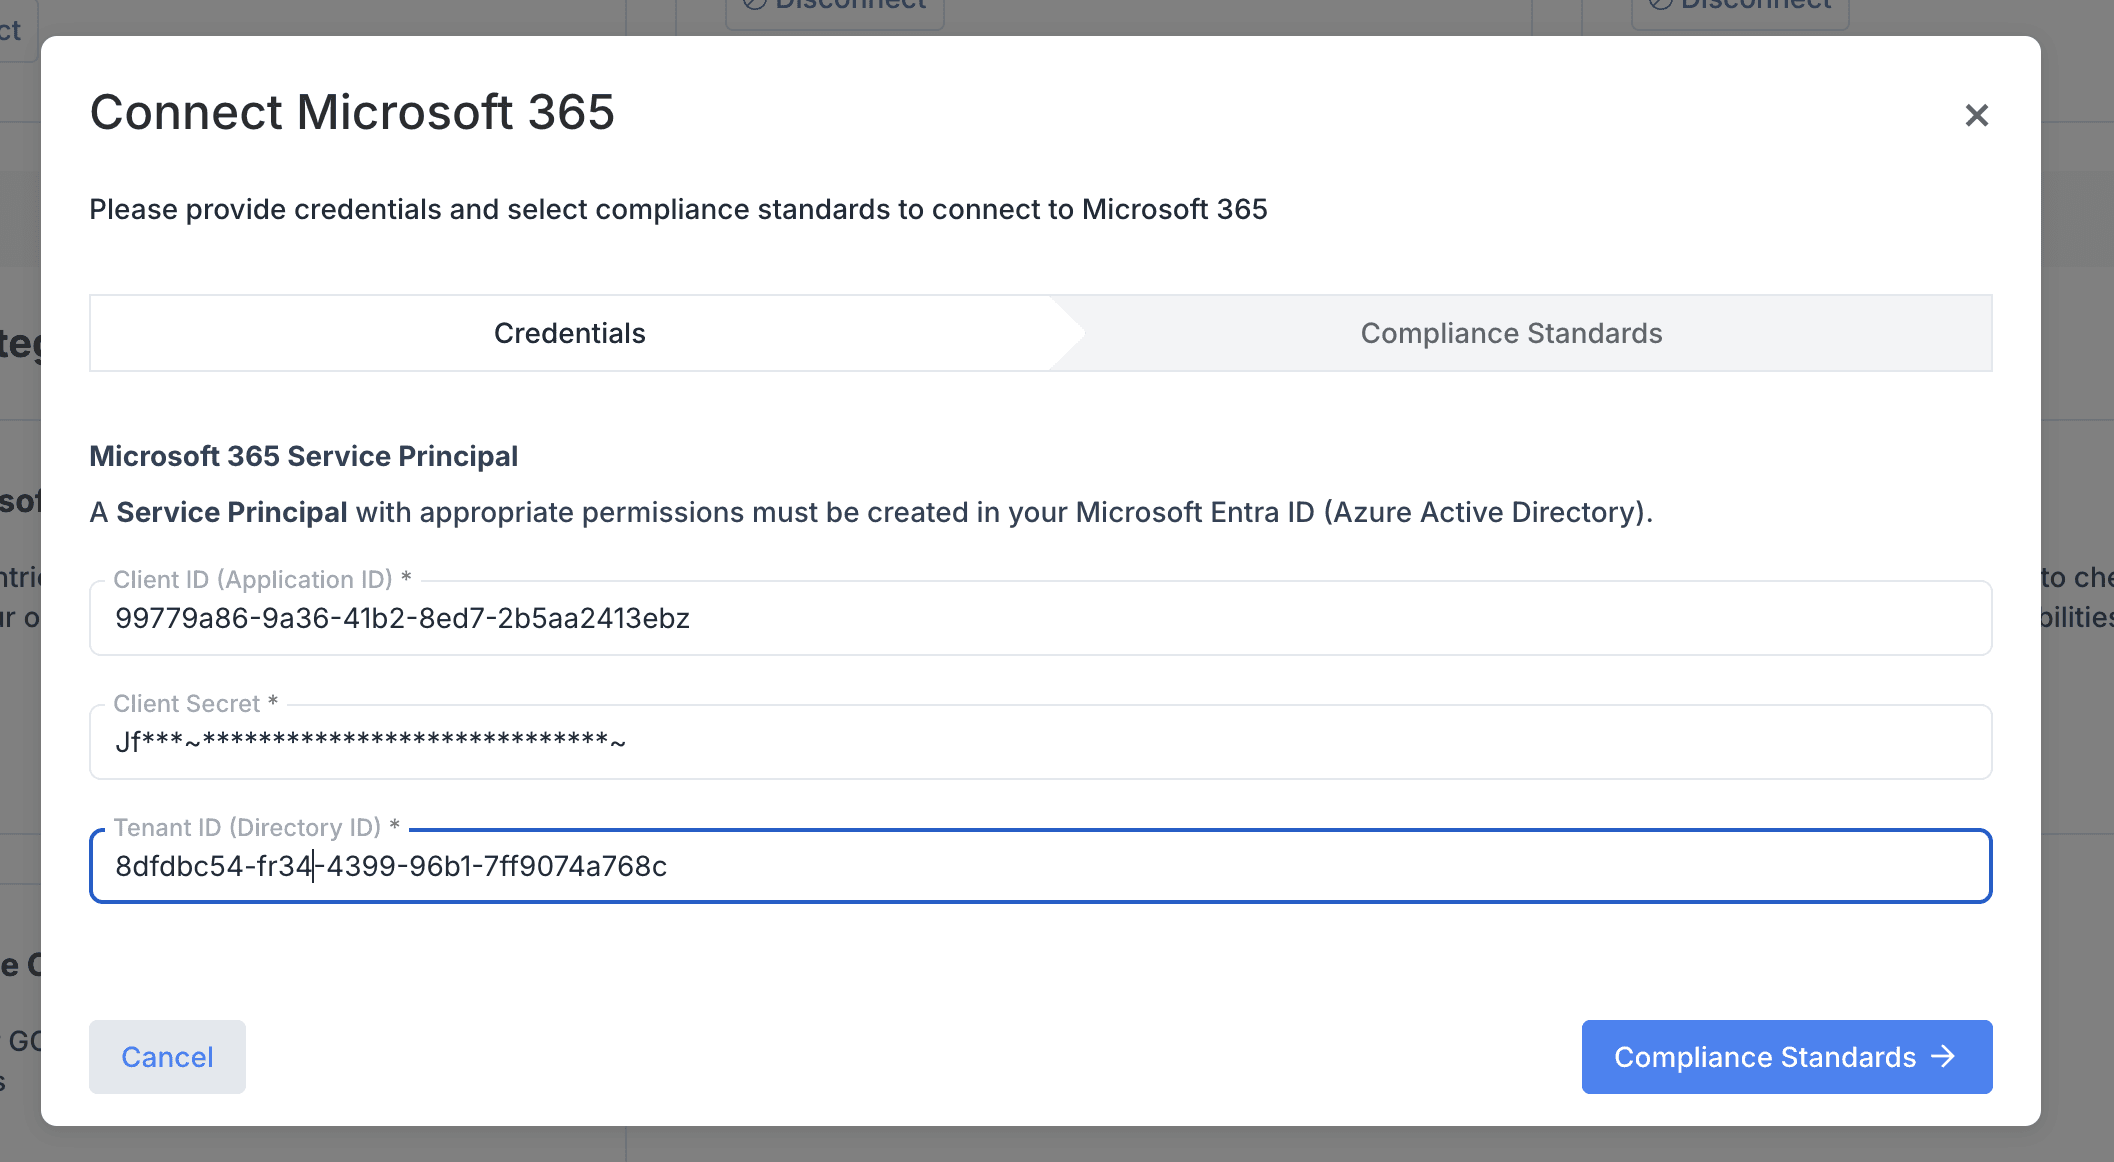
Step 4: Enter Credentials
Once you have created the Service Principal, complete the credentials section:
Client ID: Enter the Application (client) ID from your Service Principal (e.g., 8asd823h-adsj22jnw-ad23ee-345ja6u...). You can find it in the Service Principal application's Overview tab(Name: Application (client) ID)
Client Secret: On the Service Principal application page, go to the Client Secrets section and copy the value.(e.g., awe-3jss0dd-ad23ae-fwtdasa-sasf8ggs...).
Tenant ID: You can find it in the Service Principal application's Overview tab(Name: Directory (tenant) ID)
Click Compliance Standards→ to proceed to the next step.
Step 5: Select Compliance Standards
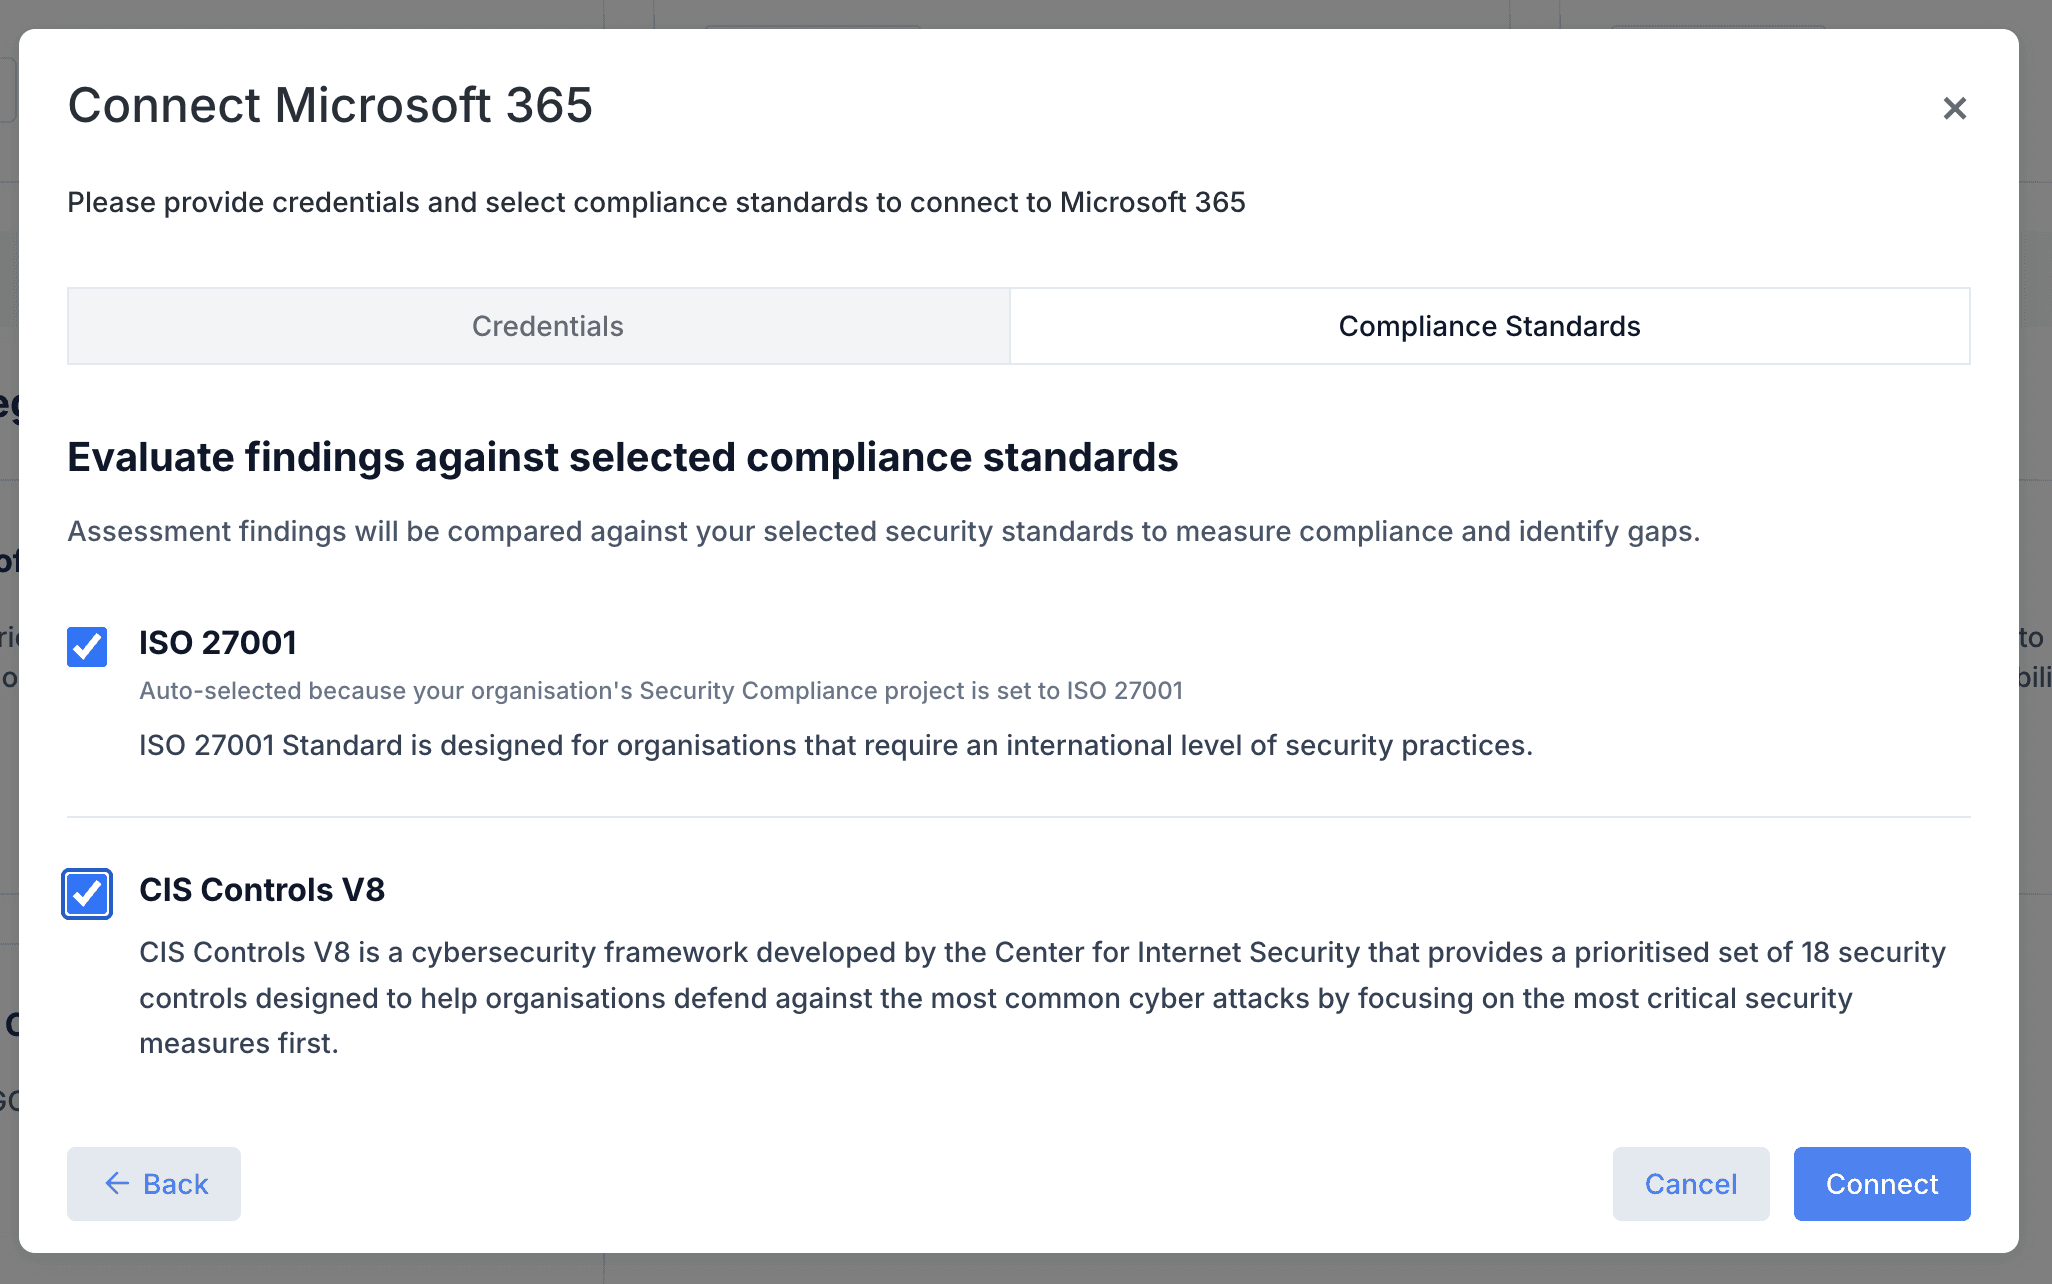
In the Compliance standards tab, choose which security frameworks to evaluate against:
Your Security Compliance Project e.g. ISO 27001 (auto-selected if your Security Compliance project is set to ISO 27001)
CIS Controls V8 (optional)
Check any additional standards you’d like to monitor. Each standard’s description appears below its checkbox. When ready, click Connect.Click Connect to finalise the setup.
Step 6: Swise will make the connection 🎉
After clicking Connect, the Swise system will:
Authenticate with Microsoft 365 using your Service Principal credentials
Verify the assigned permissions
Activate monitoring for your Microsoft 365 tenant
Soon results from this monitoring will become available in the Cloud Security dashboard, which you can access by selecting Cloud Security from the Swise menu.
Troubleshooting
Common Issues
Authentication Failed
Verify your Client ID, Client Secret, and Tenant ID are correct
Ensure the client secret hasn't expired
Check that admin consent has been granted for all API permissions
Insufficient Permissions
Confirm all Microsoft Graph API permissions are assigned
Verify external API permissions for Exchange and Teams are configured
Check that the Global Reader role has been assigned to your Service Principal
Ensure admin consent is granted for all permissions
Connection Timeout
Ensure your Microsoft 365 tenant is active and accessible
Verify network connectivity to Microsoft services
Check if any conditional access policies are blocking the Service Principal